Category: Uncategorized

Give it a Whirl Penguin Place Card

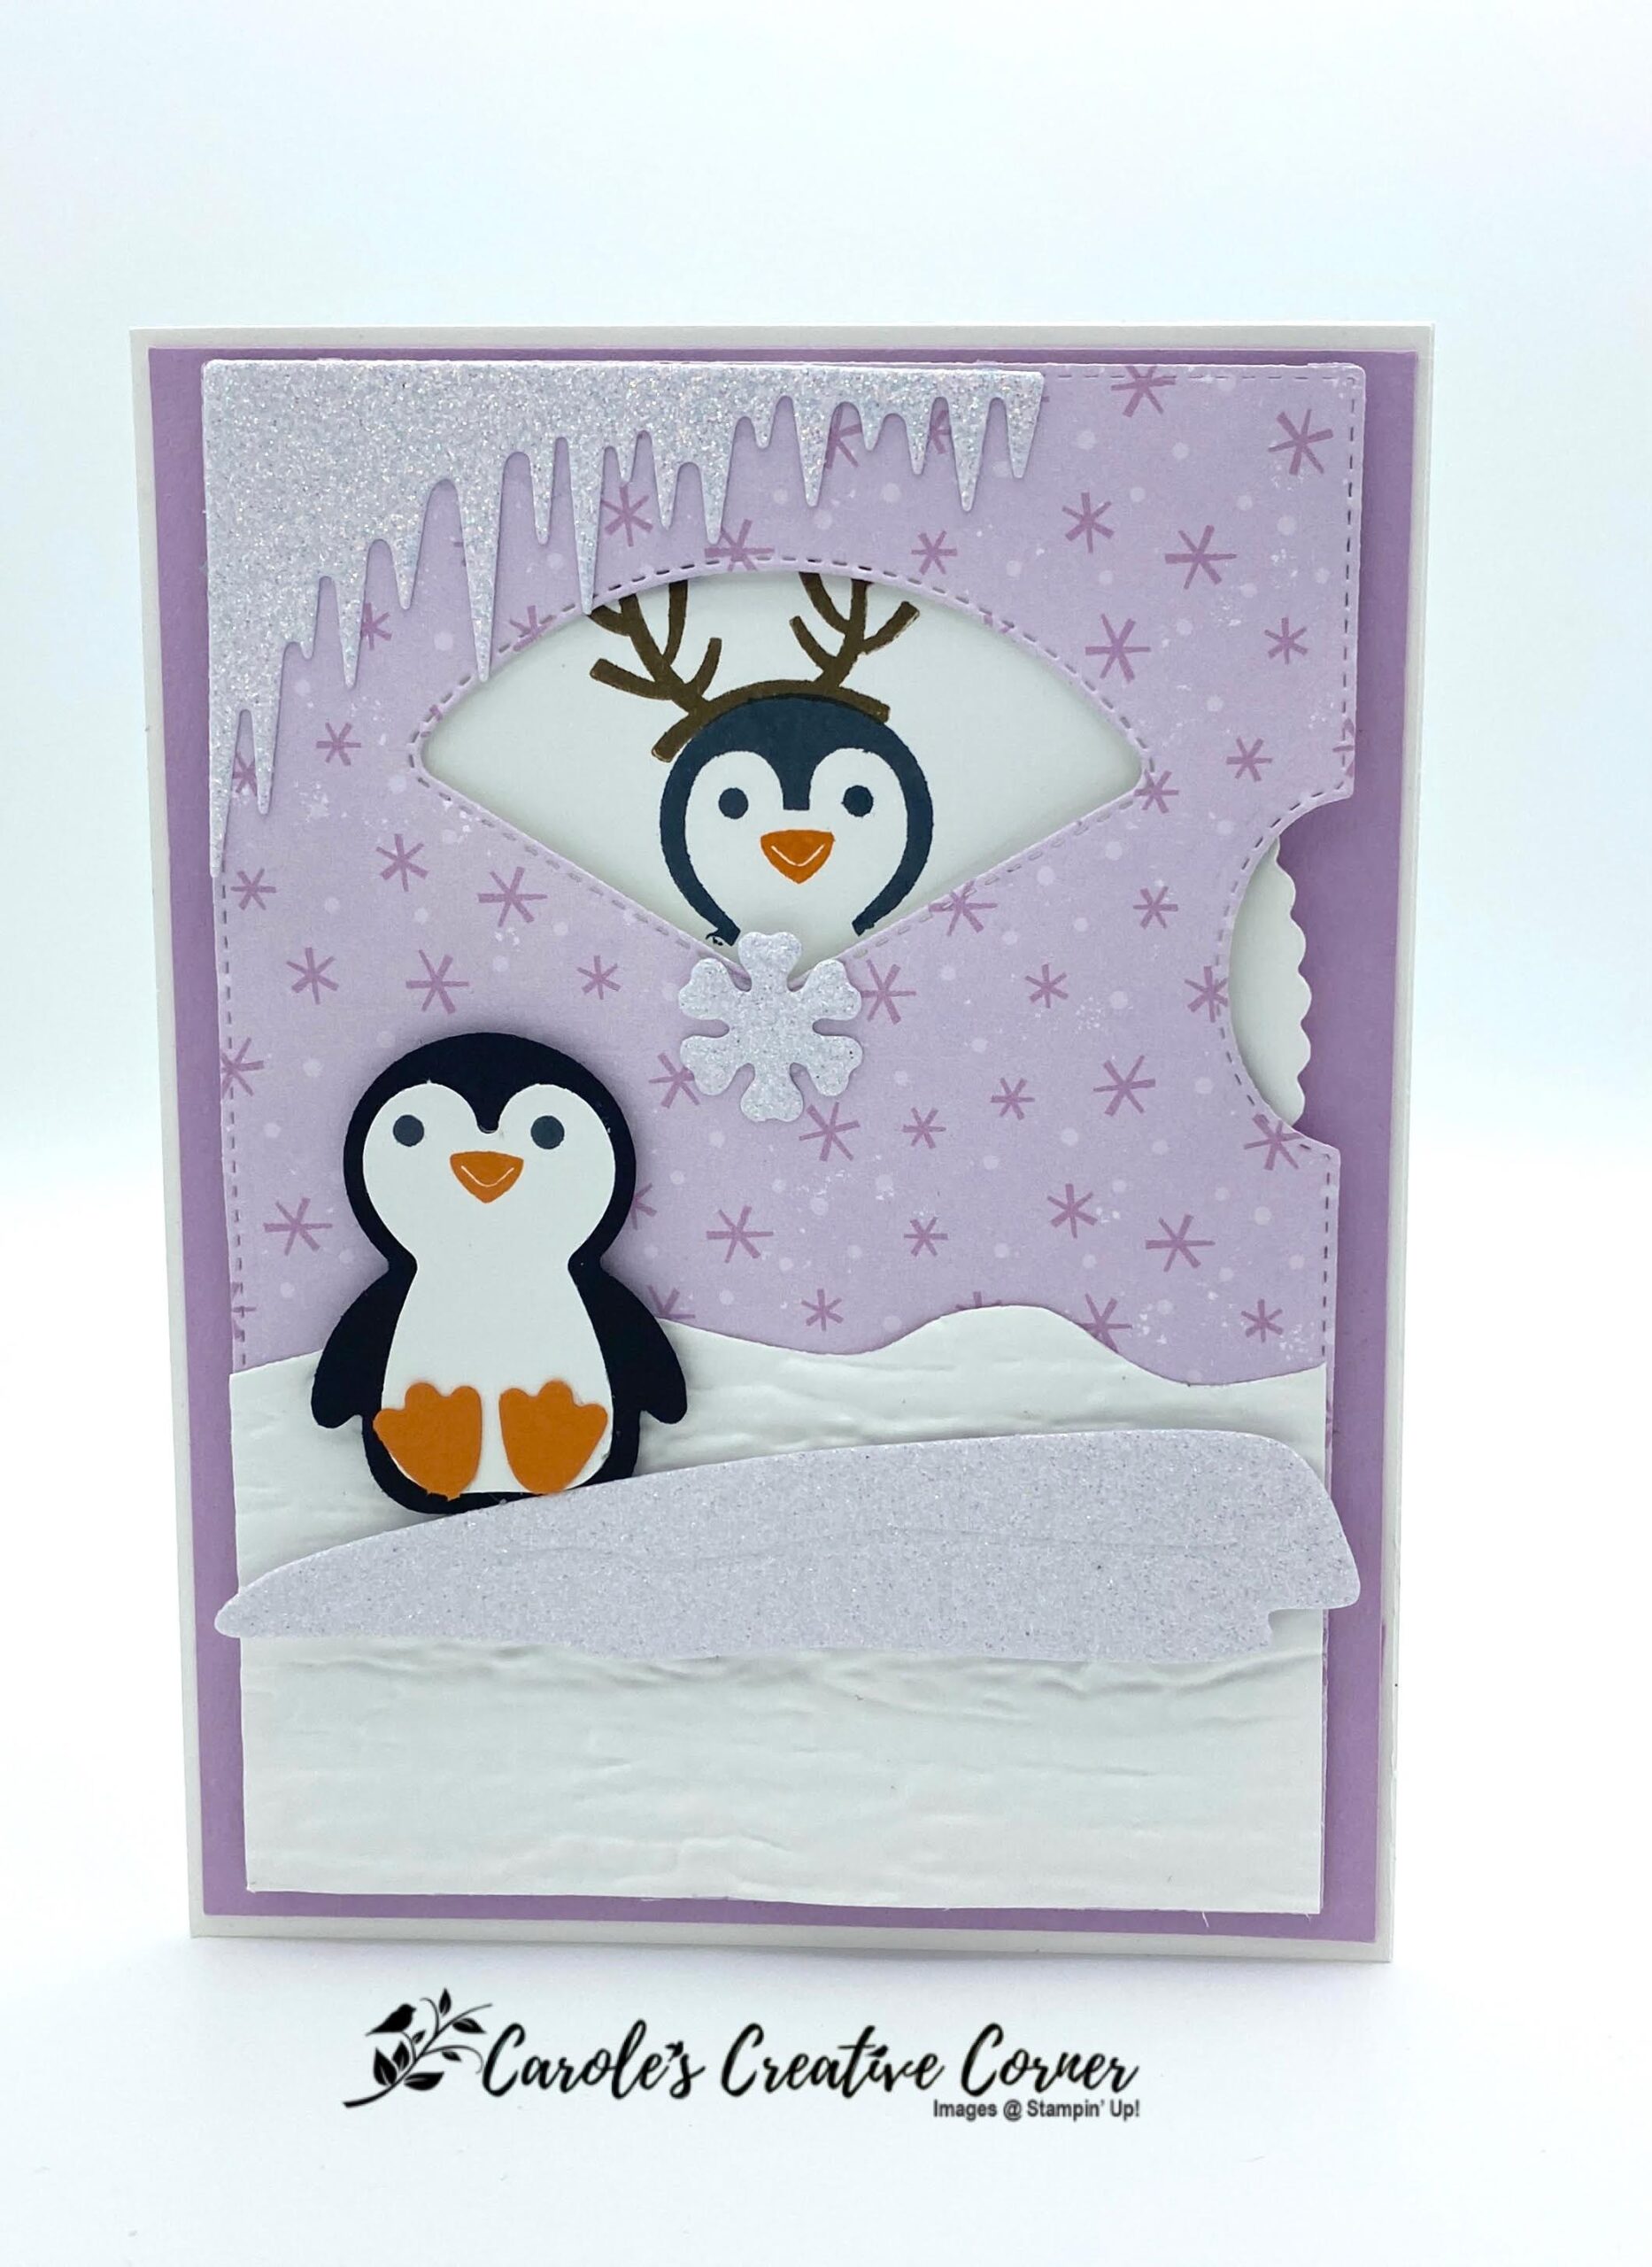
Here is a card example of using the Give it a Whirl Dies, the Penguin Place bundle along with new Sale-A-Bration (SAB) Paper. I love interactive cards and also love getting free items to make projects! This card uses the Penquin Place SAB paper, free with a $50 purchase until Sept. 30 or while supplies last. Another card example at the bottom of this blog uses the Peaceful Prints–both equally adorable!

Give it a Whirl

Measurements:

  • Basic White cardstock: 5.5″x 8.5, scored at 4.25″ along the 8.5″ side; (1) 3.75″ x 2 1/8″; (1) piece for 3 3/4″ square piece for dial die cut; piece for 1 3/8″ circle; piece for penguin punch
  • Fresh Freesia cardstock: 4 1/8″ x 5 3/8″
  • Penguin Place Designer Series Paper: 4.25″ x 5.25″
  • White Glitter Paper: pieces for glacier, snowflake and icicle dies cuts; optional piece for hat and scarf
  • Basic Black cardstock: piece for penguin body
  • Pumpkin Pie cardstock: piece for feet punch

Preparation for Give it a Whirl card:

  • Using the Penguin Punch, punch the penguin body from Basic Black cardstock, the middle of the penguin with Basic White and the feet with Pumpkin Pie cardstock. Next, adhere pieces together. Note: the feet look good in front on the white or behind the black penguin body. Stamp the eyes in Tuxedo Black ink and the nose in Pumpkin Pie ink.
  • Make a circle template for stamping the penguins onto to the spinning wheel. This template will prevent the extra ink from getting in the other windows. To make the template, die cut the spinning wheel from Basic White cardstock and then die cut a window out of it, like Figure 1.
Give it a Whirl
Figure 1.
  • Next, die cut the DSP using the Give it a Whirl Frame. Punch a 1 3/8″ circle in Basic White cardstock.
  • Die cut the icicles and glacier from the Polar Bear dies, and the snowflake from the So Many Snowflakes Dies using white glitter paper (non-SU).
  • Then die cut a spinning wheel from Basic White cardstock. Place the template (made earlier) over the spinning wheel, by lining up the open window with the embossed window frame on the spinning wheel. Stamp the penguin in Tuxedo Black ink so that his head and part of his shoulder is stamped in the open window. (Note: the excess ink from his body will stamp on the template and keep the spinning wheel clean of excess ink.) See Figure 2.
Give it a Whirl
Figure 2.
  • Move the template so the open window is in the next embossed window area on the spinning wheel. Stamp again the penguin head and partial shoulders.
  • Move the template so the open window is in the last embossed window area on the spinning wheel. Stamp sentiment in Fresh Freesia ink.
  • Now you can remove the template and stamp a hat in Fresh Freesia on one penguin and antlers in Soft Suede on the other penguin and any other things you would like (for example, there are snowflakes that come with this stamp set, too!)
  • Punch a small hole in the center of the 1 3/8″ circle.
  • Take the 2.25″ x 3.75″ Basic White Cardstock and place the hill die from the Polar Bears dies at the very top along the 3.75″ side to create a hill. Then, emboss this piece with the Bark 3D embossing folder so the bark is going horizontal along the 3.75″ side.

Assembly:

  • Fold the Basic White cardstock base in half. Adhere and center the piece of Fresh Freesia to the cardbase.
  • Place a brad through the front of the spinning wheel and through the center of the 1 3/8″ circle and lightly close brad. (Note: if the brad is too tight, the wheel will not spin freely). Put 2 dimensionals on the back of the 1 3/8″ circle. This 1 3/8″ circle will allow the spinning wheel to move more freely, as shown in Figure 3.
Give it a Whirl
Figure 3.
  • Set the spinning wheel behind the DSP, and line up the holes on the front of the DSP and the brad. Hold these 2 pieces in place and turn the DSP over so you can tell where to place the dimensionals on the DSP, making sure not to place a dimensional where the spinner will be turning.
  • Only take the backings off the dimensionals on the 1 3/8″ circle. Then hold the DSP and the spinner together and center onto the 4 1/8″ x 5 3/8″ Fresh Freesia cardstock. This allows you to place where the spinner properly. See Figure 4.
Give it a Whirl
Figure 4.
  • Now take the backings off the dimensionals on the back of the DSP, by keeping the brad and hole on DSP centered, place onto the Fresh Freesia cardstock. See Figure 5.
Give it a Whirl
Figure 5.
  • Now it’s time for the rest of the decorations! Adhere the snow hill at the bottom of the DSP.
  • Next, adhere the glacier with dimensionals on the front of the card. Adhere the icicles to the upper left part of the DSP. Place the penguin on top of the glacier with dimensionals. Adhere the glitter snowflake over the hole on the front of the card.

Here’s some alternative colors for additional ideas. I fussy cut the hat and scarf by stamping them on the back of glitter paper and then cutting them out. I think they should all have hats and scarves to keep them warm!

Give it a Whirl
Give it a Whirl

Supplies:

Encircled in Beauty Layered Card

The Encircled in Beauty dies make any card beautiful! Paired along with the gorgeous Expressions in Ink Specialty paper and several layers, this card will impress your recipient! I love layered cards and this one has 6 layers, but is easy to assemble. Give it a try!

Encircled in Beauty

Measurements:

Pale Papaya cardstock: 4.25″ x 11″, scored at 5.5″ along 11″, 4″ x 5.25″, 1.5″ circle
Pear Pizzaz cardstock: 3 3/8″ x 4 5/8″
Expressions in Ink Specialty Designer Series Paper: 3.25″ x 3.5″ floral and 1″ x 3.25″ in the stripe
Basic White Cardstock: 4″ x 5.25″, 1 3/8″ circle
Pale Paypaya & White 1/2″ ribbon: 9.5″

Preparation:

  • Emboss the 4″ x 5.25″ Pale Papaya cardstock with the Pretty Flowers embossing folder.
  • Stamp the sentiment in Pear Pizzaz ink on the white circle.
  • Die cut the ornate circle from Basic White cardstock.

Assembly:

  • Adhere the embossed piece of Pale Papaya to the card base.
  • Adhere the 2 pieces of DSP to the Pear Pizzaz cardstock. Next, place the Pear Pizzaz cardstock centered on the front of the card with dimensionals.
  • Place the white circle on the Pale Papaya circle and adhere together. Place the Pale Papaya circle on the Basic White ornate circle. Next, place the Basic white ornate circle centered on the the floral patterned paper with dimensionals.
  • Tie a bow with the ribbon and place the bow on the card with glue dots on the center line between the 2 pieces of DSP.
  • Add gold gemstone to the white circle under the sentiment.

Supplies for Encircled in Beauty Layered Card:

Quiet Meadow Bundle Fun Fold

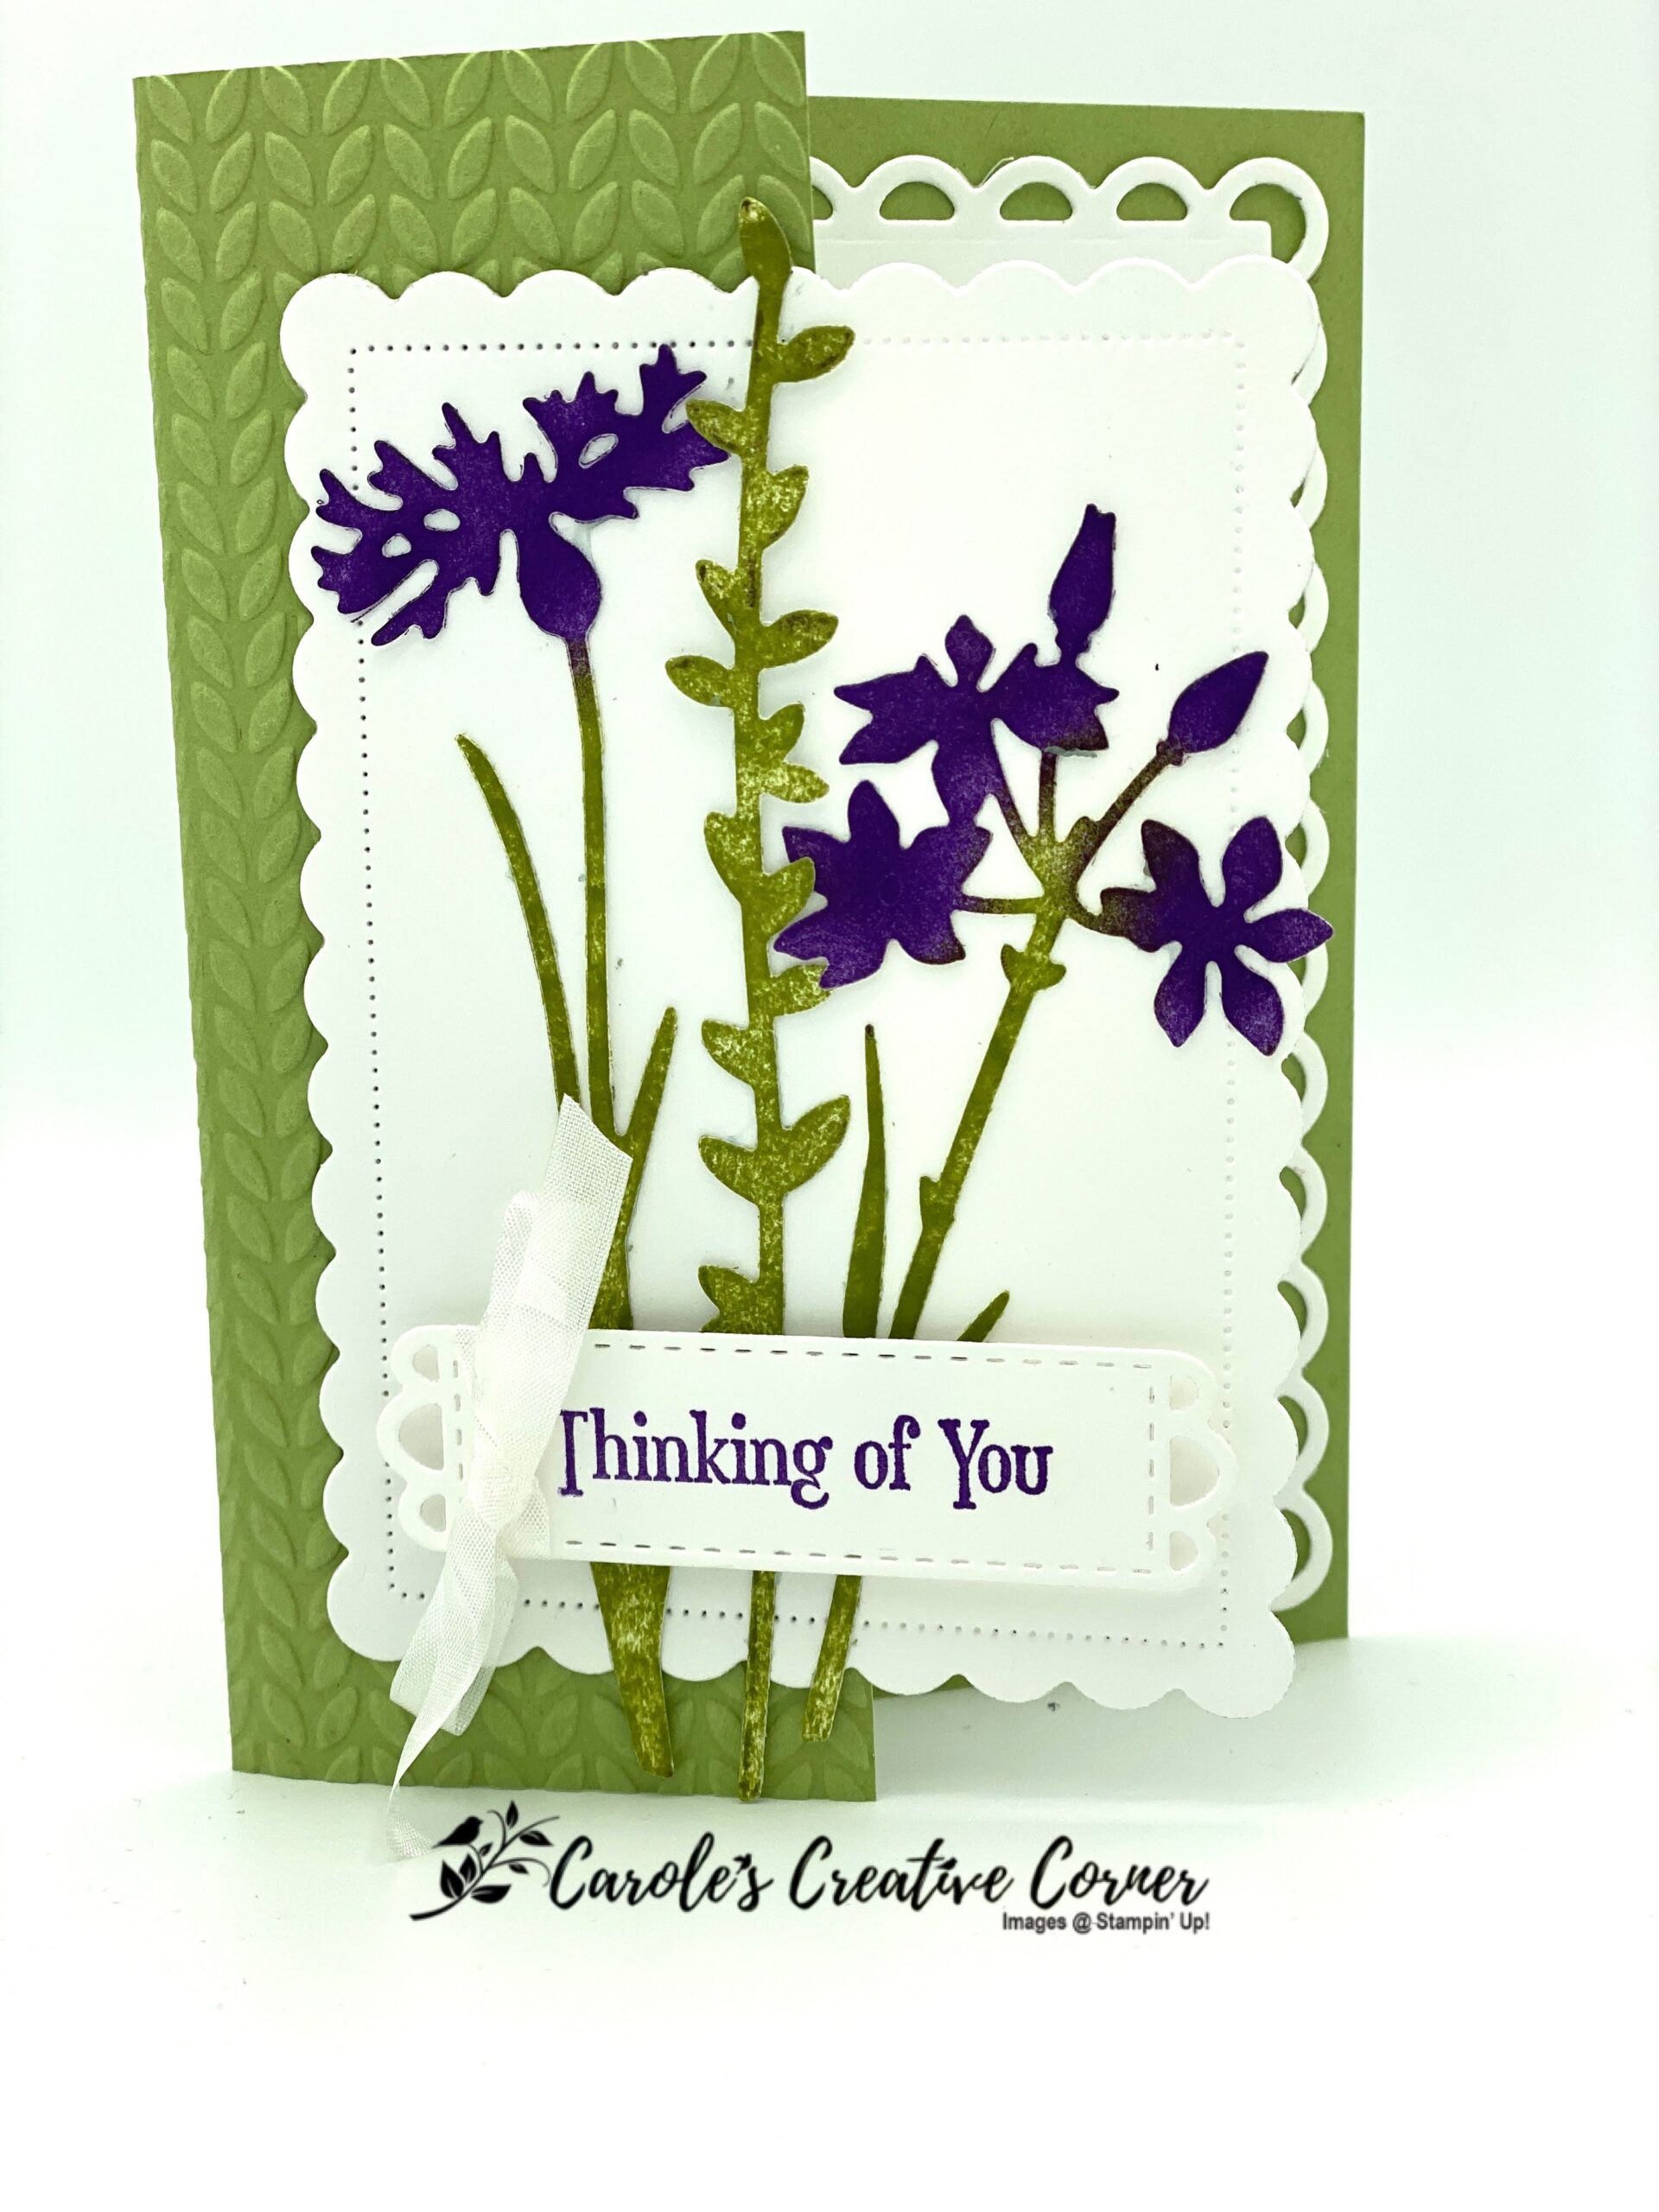
I love using the Quiet Meadow Bundle to make flower sillouettes and they look so pretty on cards for any occasion. The meadow flowers are colored with sponge daubers and ink–imagine the color possibilities! The Scalloped Contours dies are also one of my favorites because of the 5 nested scalloped rectangles, each uniquely different.

Quiet Meadow

Measurements:

Pear Pizzaz cardstock: 5.5″ x 6 3/8″, scored at 4.25″ along the 6 3/8″ side
Basic White cardstock: (2) 4.25 x 5.5″, pieces for the label and flowers

Preparation:

  • Die cut 3 of the flowers/stems from Basic White cardstock, 1 label and the 2 largest Color and Contours rectangles.
  • Emboss the 2 1/8″ flap on the Pear Pizzaz with the Greenery Embossing Folder.
  • To apply color to the flowers, use a sponge dauber to apply Pear Pizzaz ink onto the stems of the flowers and then apply Gorgeous Grape ink in the same way to the flowers.
  • Stamp sentiment in Gorgeous Grape ink on the lable.

Assembly:

  • Adhere the large scallop rectangle on the 4.25″ x 5.5″ side of the Pear Pizzaz cardstock.
  • Fold the 2 1/8″ flap on top of the large scallop rectangle; this is the front of the card.
  • Place the smaller rectangle onto the 2 1/8″ flap, so that it is centered inside the large scalloped rectangle. Glue 1/2 the back of the smaller rectangle; the right side of the rectangle will not be adhered.
  • Adhere the flowers to the front of the smaller rectangle.
  • Tie white ribbon around the white label on the left hand side. Put dimensionals on the back of the white label. The dimensional on the left side should straddle the ribbon and the label itself; this will help to keep the ribbon in place.

Supplies for Quiet Meadow Fun Fold Card:

Seashells Pearlized Technique

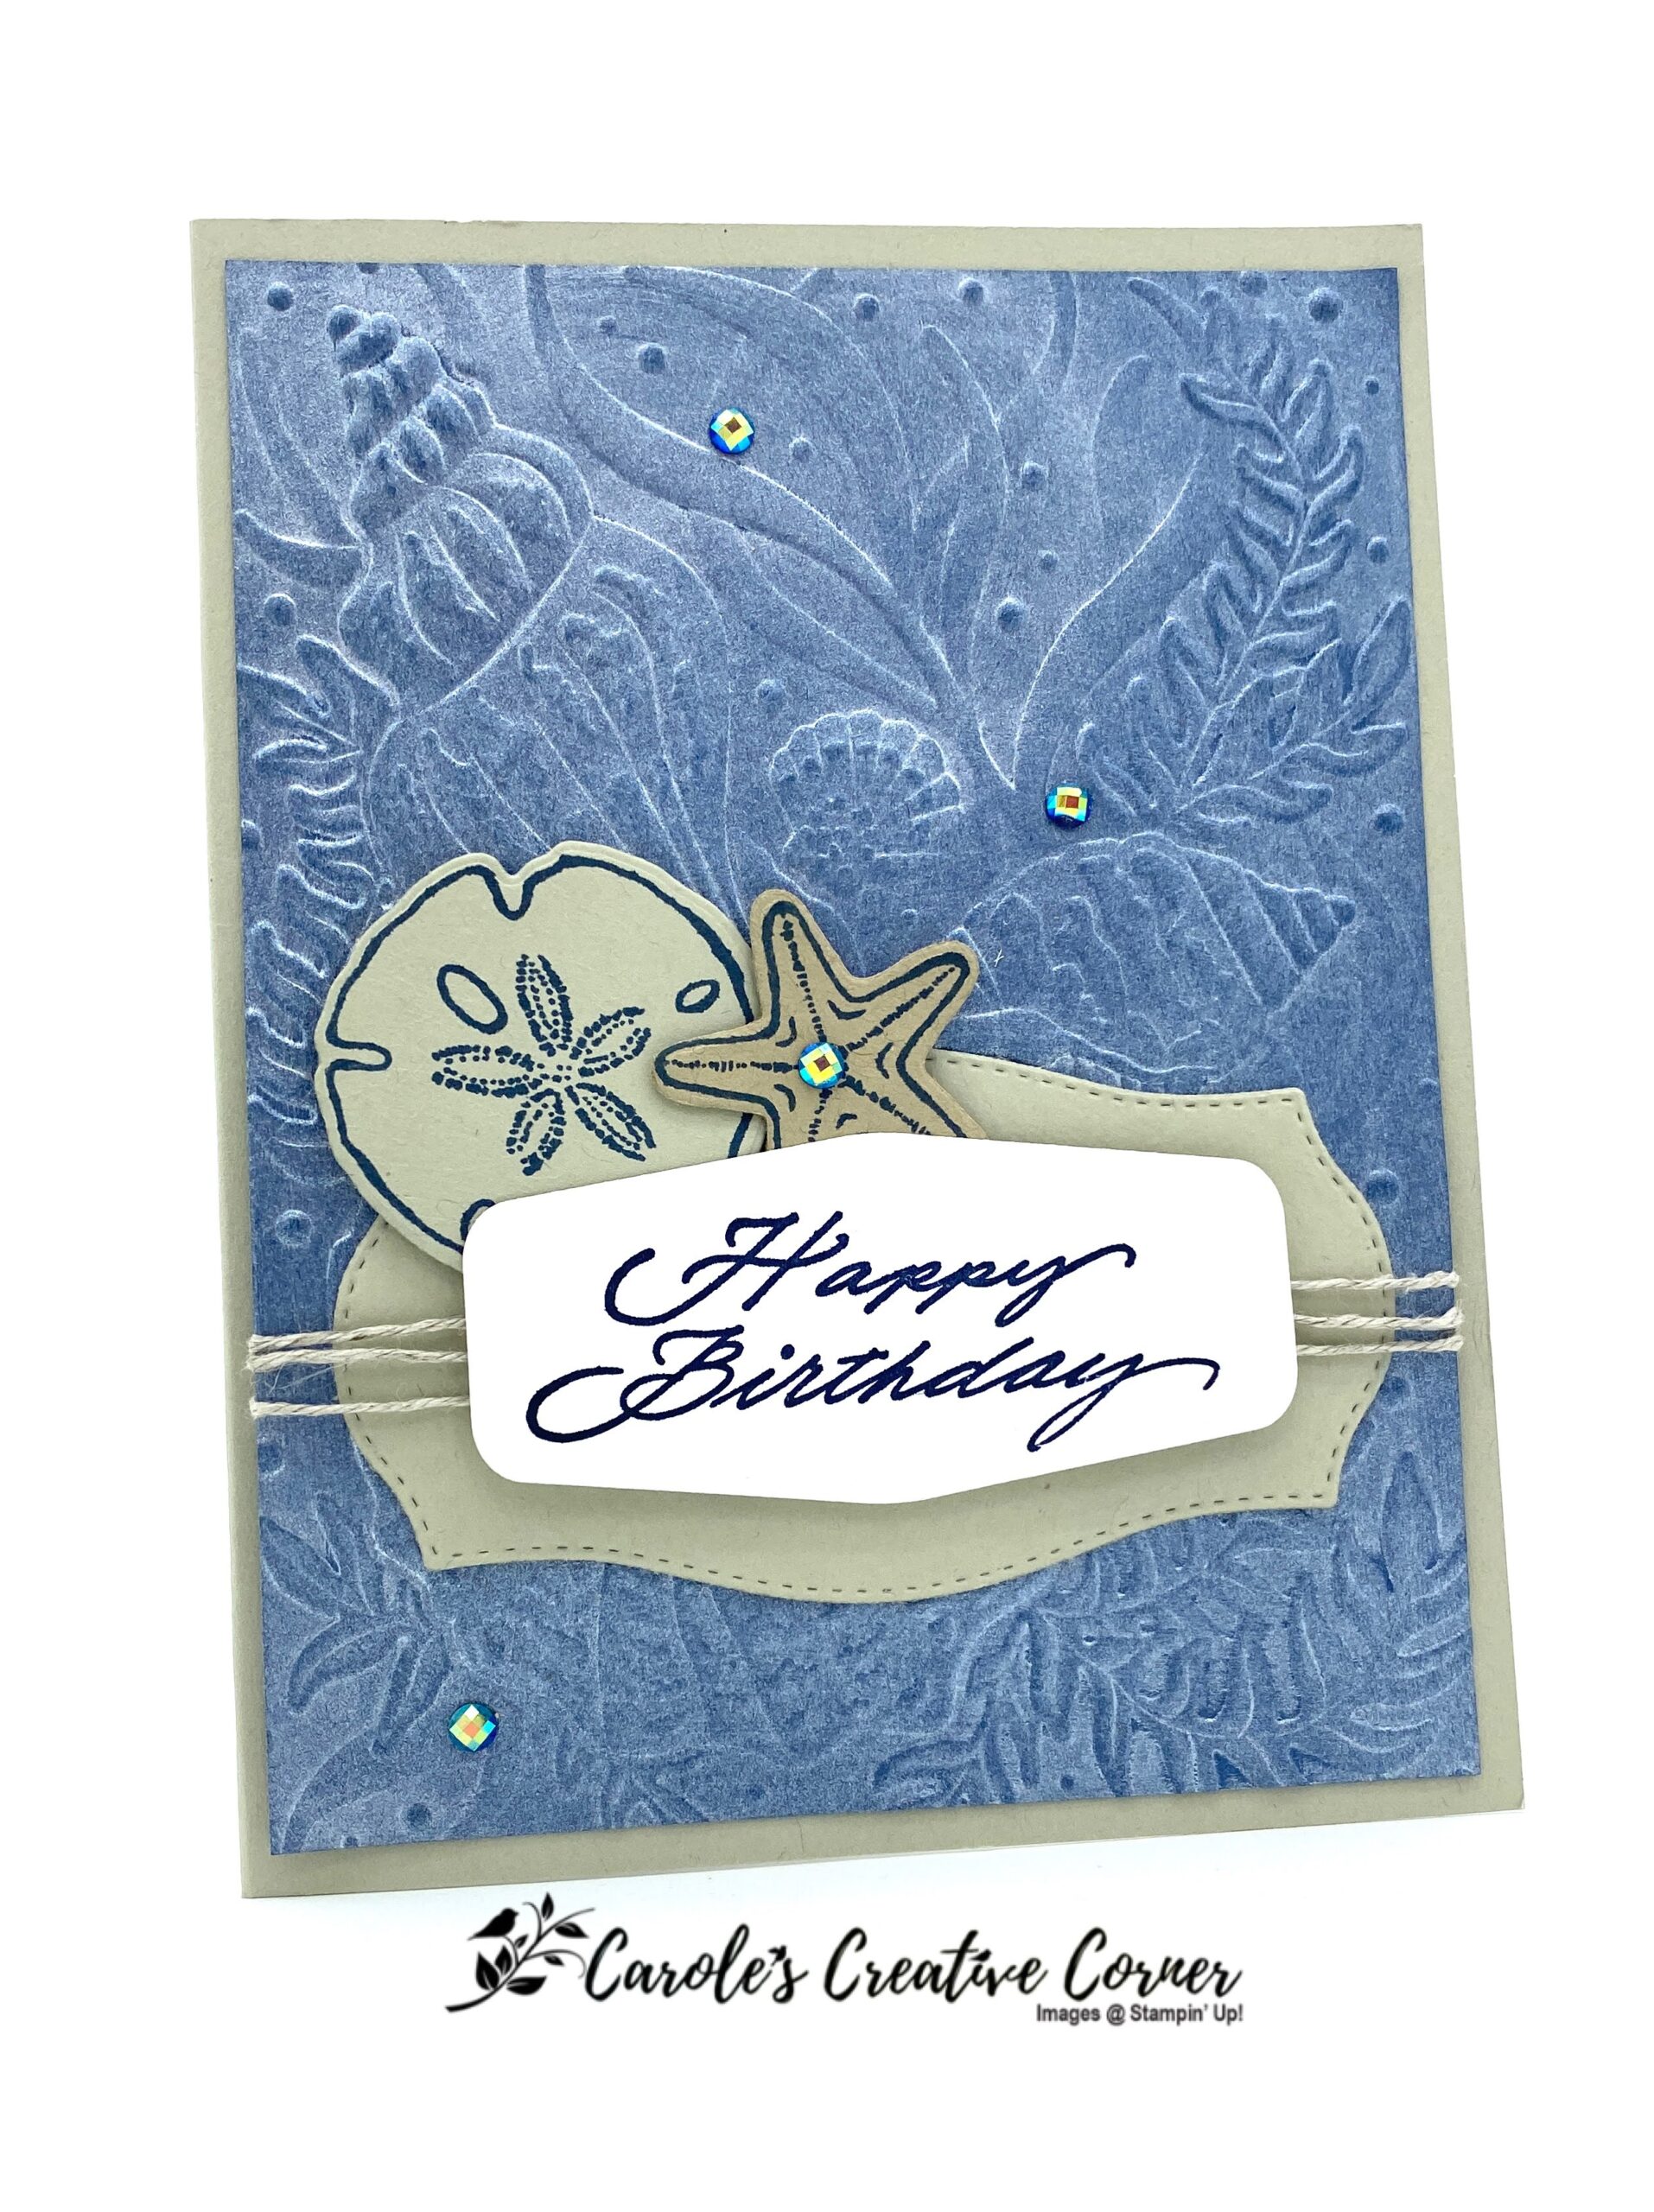
Want to learn the pearlized technique to give your paper a pearlized shimmer look? This post tells you how!

Seashells Pearlized Technique

Measurements for Seashells Pearlized Technique card:

Misty Moonlight cardstock: 4″ x 5.25″, piece for seaweed die cut
Sahara Sand cardstock: 5.5″ x 8.5″, scored at 4.25″ along the 8.5″, piece for sand dollar die cut, piece for label
Basic White cardstock: 4″ x 5.25″, piece for label
Crumb Cake cardstock: piece for starfish die cut
Linen Thread: 6″ x 3

Preparation:

  • Emboss the Misty Moonlight cardstock with the Seashells 3D embossing folder.
  • Die cut the larger label in Sahara Sand and the small in Basic White. Next, die cut 2 sand dollars in Sahara Sand and 2 star fish in Crumb Cake. Lastly, die cut the seaweed in Misty Moonlight cardstock.
  • Stamp the sentiment on the white label in Night of Navy ink, and the Sand Dollars and Star Fish in Misty Moonlight ink.
  • To create the pearlized paper effect, apply Frost White shimmer paint (now retired but available on Amazon) to the front of the embossed Misty Moonlight cardstock. To do this, shake the paint and apply a dime size amount onto an acrylic block. Dip 1/4 of yellow sponge into paint so that it picks up a small amount, and in a swirl motion, apply paint to the cardstock front. Repeat until the front is completely covered. This will dry in a few minutes.

Assembly:

Adhere the Sahara Sand label to the front of the Misty Moonlight card front, near the bottom 3rd of the card. Place the 3 linen threads across the front of the Sahara Sand label and secure to the backside of the Misty Moonlight card stock with Scotch tape. Use 4 dimensionals to apply the white label on top of the linen thread (this way the label won’t rock) and centered in the middle of the Sahara Sand label. Adhere a Sand Dollar to the front behind the tag and a starfish using a dimensional. Add rhinestones to the front.

Adhere the Basic White cardstock to the inside. Add the seaweed, sand dollar, and starfish to the inside.

Supplies:

Creative Inking Blog Hop: Fun Fold Double Gatefold

Creative inking blog hop

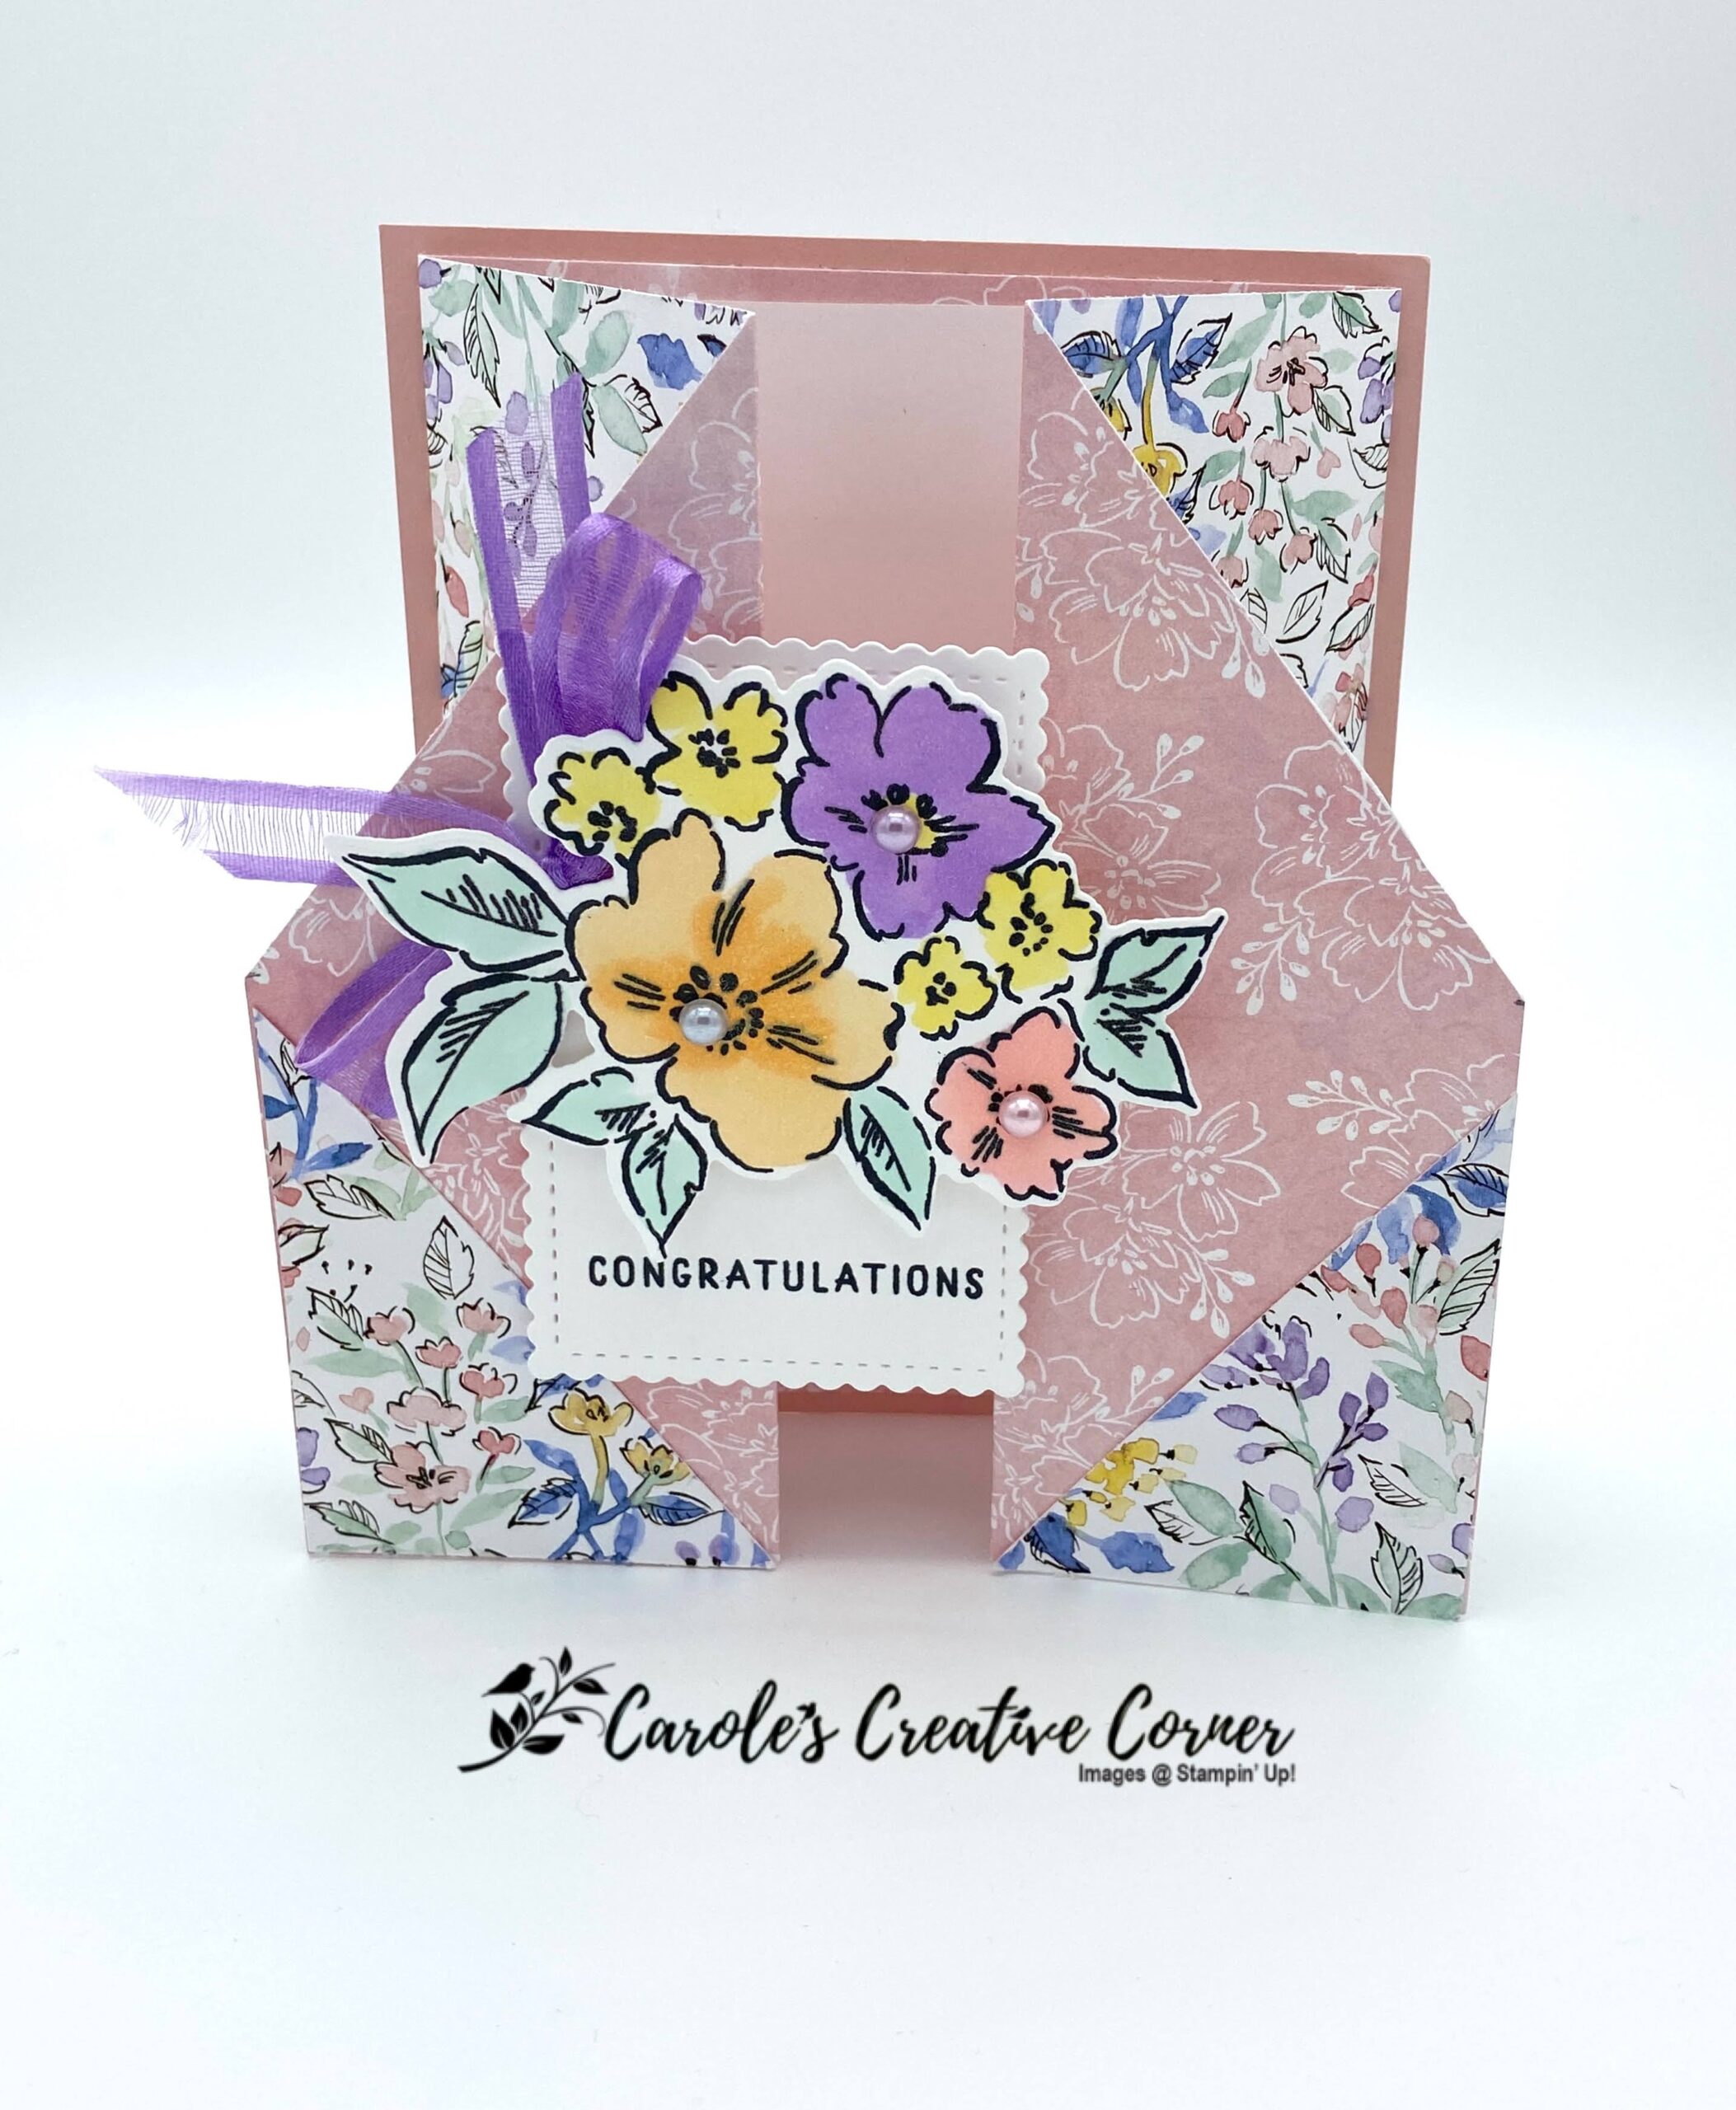
This blog will show you how to make a Double Gatefold Card using your favorite double sided DSP. This card features the Hand-Penned DSP, but any that you like will do! This fun fold shows how to angle the corners and use the pieces that are cut off to use on the front to make a diamond shape in the center when the doors are closed (see Figure 2).

Figure 1

Measurements:

Hand-Penned Designer Series Paper – 5 ¼ “ x 12, scored at 2” 4”, 8”, & 10” 

Blushing Bride cardstock – (1) 4 ¼” x 5 1/2”

Basic White cardstock:  (1) 3 ¾ ” x 5” rectangle for inside, 2” x 3 1/8” for 3rd largest scallop rectangle from Stitched so Sweetly dies, (1) piece of Basic White for die cut image from Hand-Penned.

Directions:

Fold DSP along score line as follows (Make sure the side of the paper you want on the outside is facing towards you and rightside up)

Fold the first score line on the left as a ‘mountain’ and the second score line on the left as a ‘valley’.

Fold the first score line on the right as ‘mountain’ and the second score line on the right as a ‘valley’.

Each side forms a double door—fold each side toward the center of the DSP. Use bone folder to crease folds.

Use a pencil to mark 2.5” down from the left top corner/end of the DSP down the left side and then do the same on the right side of the DSP. (Make sure your DSP print is right side up before cutting)

Use your trimmer to cut a diagonal on the top lefthand side, starting from the 2.5” mark to the 1st score line.Cut a second diagonal on the top righthand end, starting from the 1st score line on the right to the 2.5” mark.

Close doors on card.  Use the corners that were cut out from the diagonal cuts and adhere them in the bottom left of the door front and the bottom right ofthe door front. (Make sure that when you adhere the pieces of DSP, that the side facing up matches the pattern on the backside of the card.)  The DSP showing in the center of the card should look like a diamond shape. 

Figure 2.

Mount card to card base cardstock. Adhere 3 ¾ ” x 5” Basic White cardstock to inside.

Position rectangle in portrait direction and stamp sentiment on rectangle near the bottom and adhere with dimensionals to one side of a door front.

Add Hand-Penned stamped/diecut image on top of rectangle with dimensionals. Wink of Stella was added to create some glimmer on the flowers.

Figure 3.

Embellish card with ribbon and pearls for the flower centers. For this card, Fresh Freesia ribbon was colored with the Light Highland Heather blend pen to better match the paper.

Hop this way to see Sue Leher’s fun fold:

Hop this way to go to the prior blog by Kelly Acheson:

Creative Inking Blog Hop Must Have New Catalog Product

Creative inking blog hop

I’m excited about the new annual catalog and especially Expressions in Ink Suite—my favorite!! I love the mixture of colors and the faux watercolor effect without all the mess! I’ll show several samples and what you can do with do with the fabulous products in this Suite! The Suite of products includes Artistically Inked stamp set, Artistic Dies, Expressions in Ink Designer Series paper, and Epherma Gold Paper:

Figure 1 – EXPRESSIONS IN INK DSP

The Designer Series Paper is absolutely gorgeous! There are several patterns where there is white space at the top and bottom and the design across the middle, like Figure 1. You can make 6 cards like Fig. 2 by cutting at 4” increments top to bottom and the cutting the paper at 6” left to right and using on your card front. These patterns make beautiful cards without much effort! The paper does all the work.

Figure 2

You can make 6 cards like Fig. 2 by cutting the paper like in Figure 1 and stamping a sentiment in the white space. So easy and pretty!

Here’s an example of using one of these patterns sideways and adding some stamping and the beautiful floral die cut from the Artistic Dies. You can make a coordinating inside using the background stamp

Another example of using one of the other colored patterns from the DSP and adding the beautiful leaf die cut from the Artistic Dies and sentiment from the stamp set. Using Polished Pink and Pale Papaya ink, the stamps were used to make a coordinating design on the inside.

This card uses another piece of the designer series paper and then adds stamped images to the front, that lines up with the floral die.

The Epherma pack contains 5 sheets of gold elements including 2 different labels and leaves—up to 50 total elements. These elements work beautifully with this Suite and you can create beautiful cards with ease!!! I love these accent pieces!

The two cards above use the stamped then die cut flowers as the focal point. The gold striped paper can be change to any coordinating color using you favorite ink color and a blending brush!

One of the stamps in Artistically Inked stamp set that is so versatile is the background stamp! You can make faux watercolor backgrounds for your card using this stamp in any color you want. The sneak peek at the June Paper Pumpkin shows a faux watercolor background in pink and purple, so I thought I would give it a try using Polished Pink and Gorgeous Grape

Thanks for stopping by. Click the image below to see what Susan Lehrer has created.

Thanks for stopping by. Click the image below to see what Kelly Acheson has created.

Creative Inking Blog Hop: Love Card

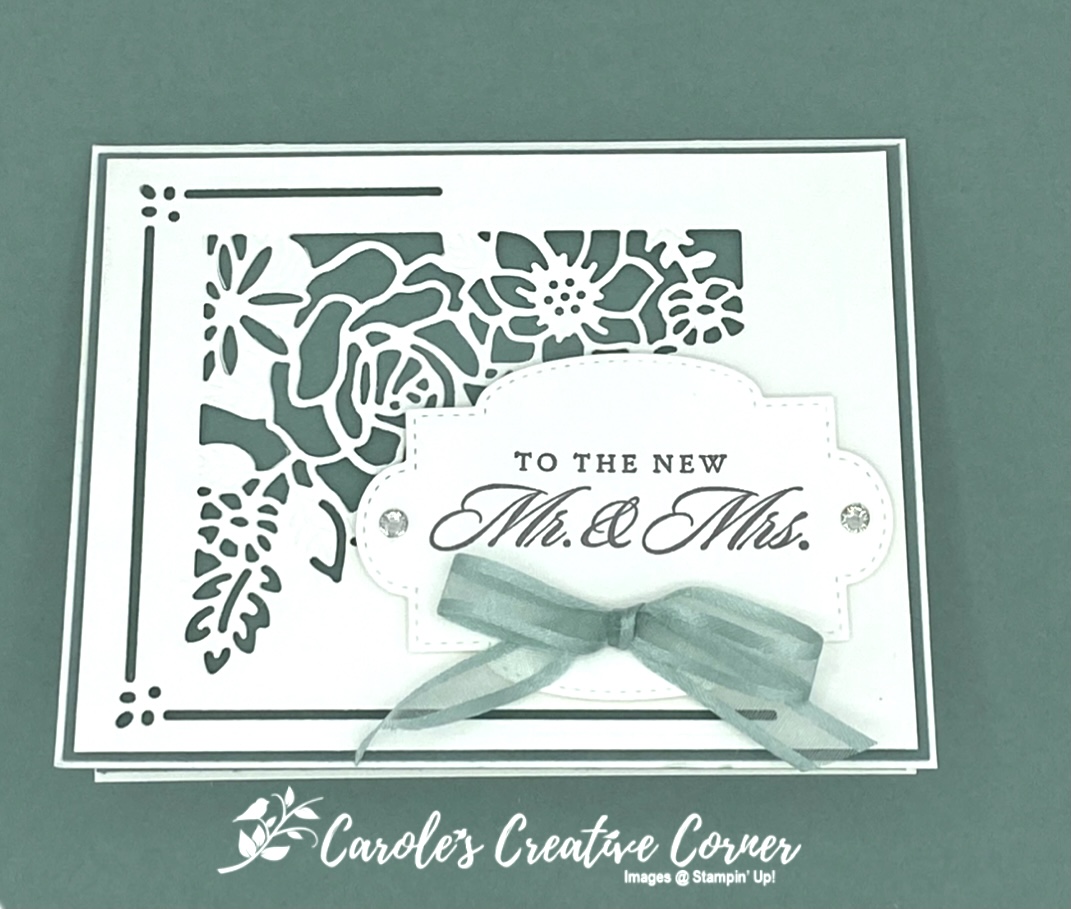
Spring is in the air and there tends to be more weddings coming up–or anniversaries and general love cards are always needed. I have an easy but elegant card to show you using the Last a Lifetime stamp set and Lasting Elegance dies. This set is retiring but is available until May 3rd or while supplies last. This card is 4 die cuts and 2 stamped images and look at the beautiful results with very little effort!

Measurements:

Thick Basic White card stock: 5.5″ x 8.5″, scored at 4.25″ on the 8.5″ side
Basic White card stock (2) 4″ x 5.25″
Soft Succulents card stock: (2) 5 3/8″ x 4 1/8″ (Available on May 4, 2021)

Directions:

Die cut one of the 4″ x 5.25″ Basic White pieces of cardstock with the outline edge and large flower die cut. Die cut the white label and stamp the sentiment in Basic Gray Ink. This is the most of the work for the front of the card!

Adhere one of the pieces of 4 1/8″ x 5 3/8″ Soft Succulent card stock to the front. Then add the die cut white cardstock onto the Soft Succulent cardstock with dimensionals.

Apply the label to the front of the card with dimensionals. Add the bow to the front with a glue dot. Now its time to stamp the inside!

Stamp the sentiment on the second piece of Basic White cardstock and use the small floral die cut in the corner. Layer the Soft Succulent card stock to the inside and then layer the Basic White card stock onto the Soft Succulent card stock.

It’s a nice touch to add the beautiful floral stamp on the back of the card and to decorate the envelope in Soft Succulent ink to match the card.

Thanks for stopping by. Click the image below to see what Susan Campfield has created.

Thanks for stopping by. Click the image below to see what Kelly Acheson has created.

Supplies: