Category: Birthday

Stampin Up Ornate Layers & Borders: Happy Birthday Card

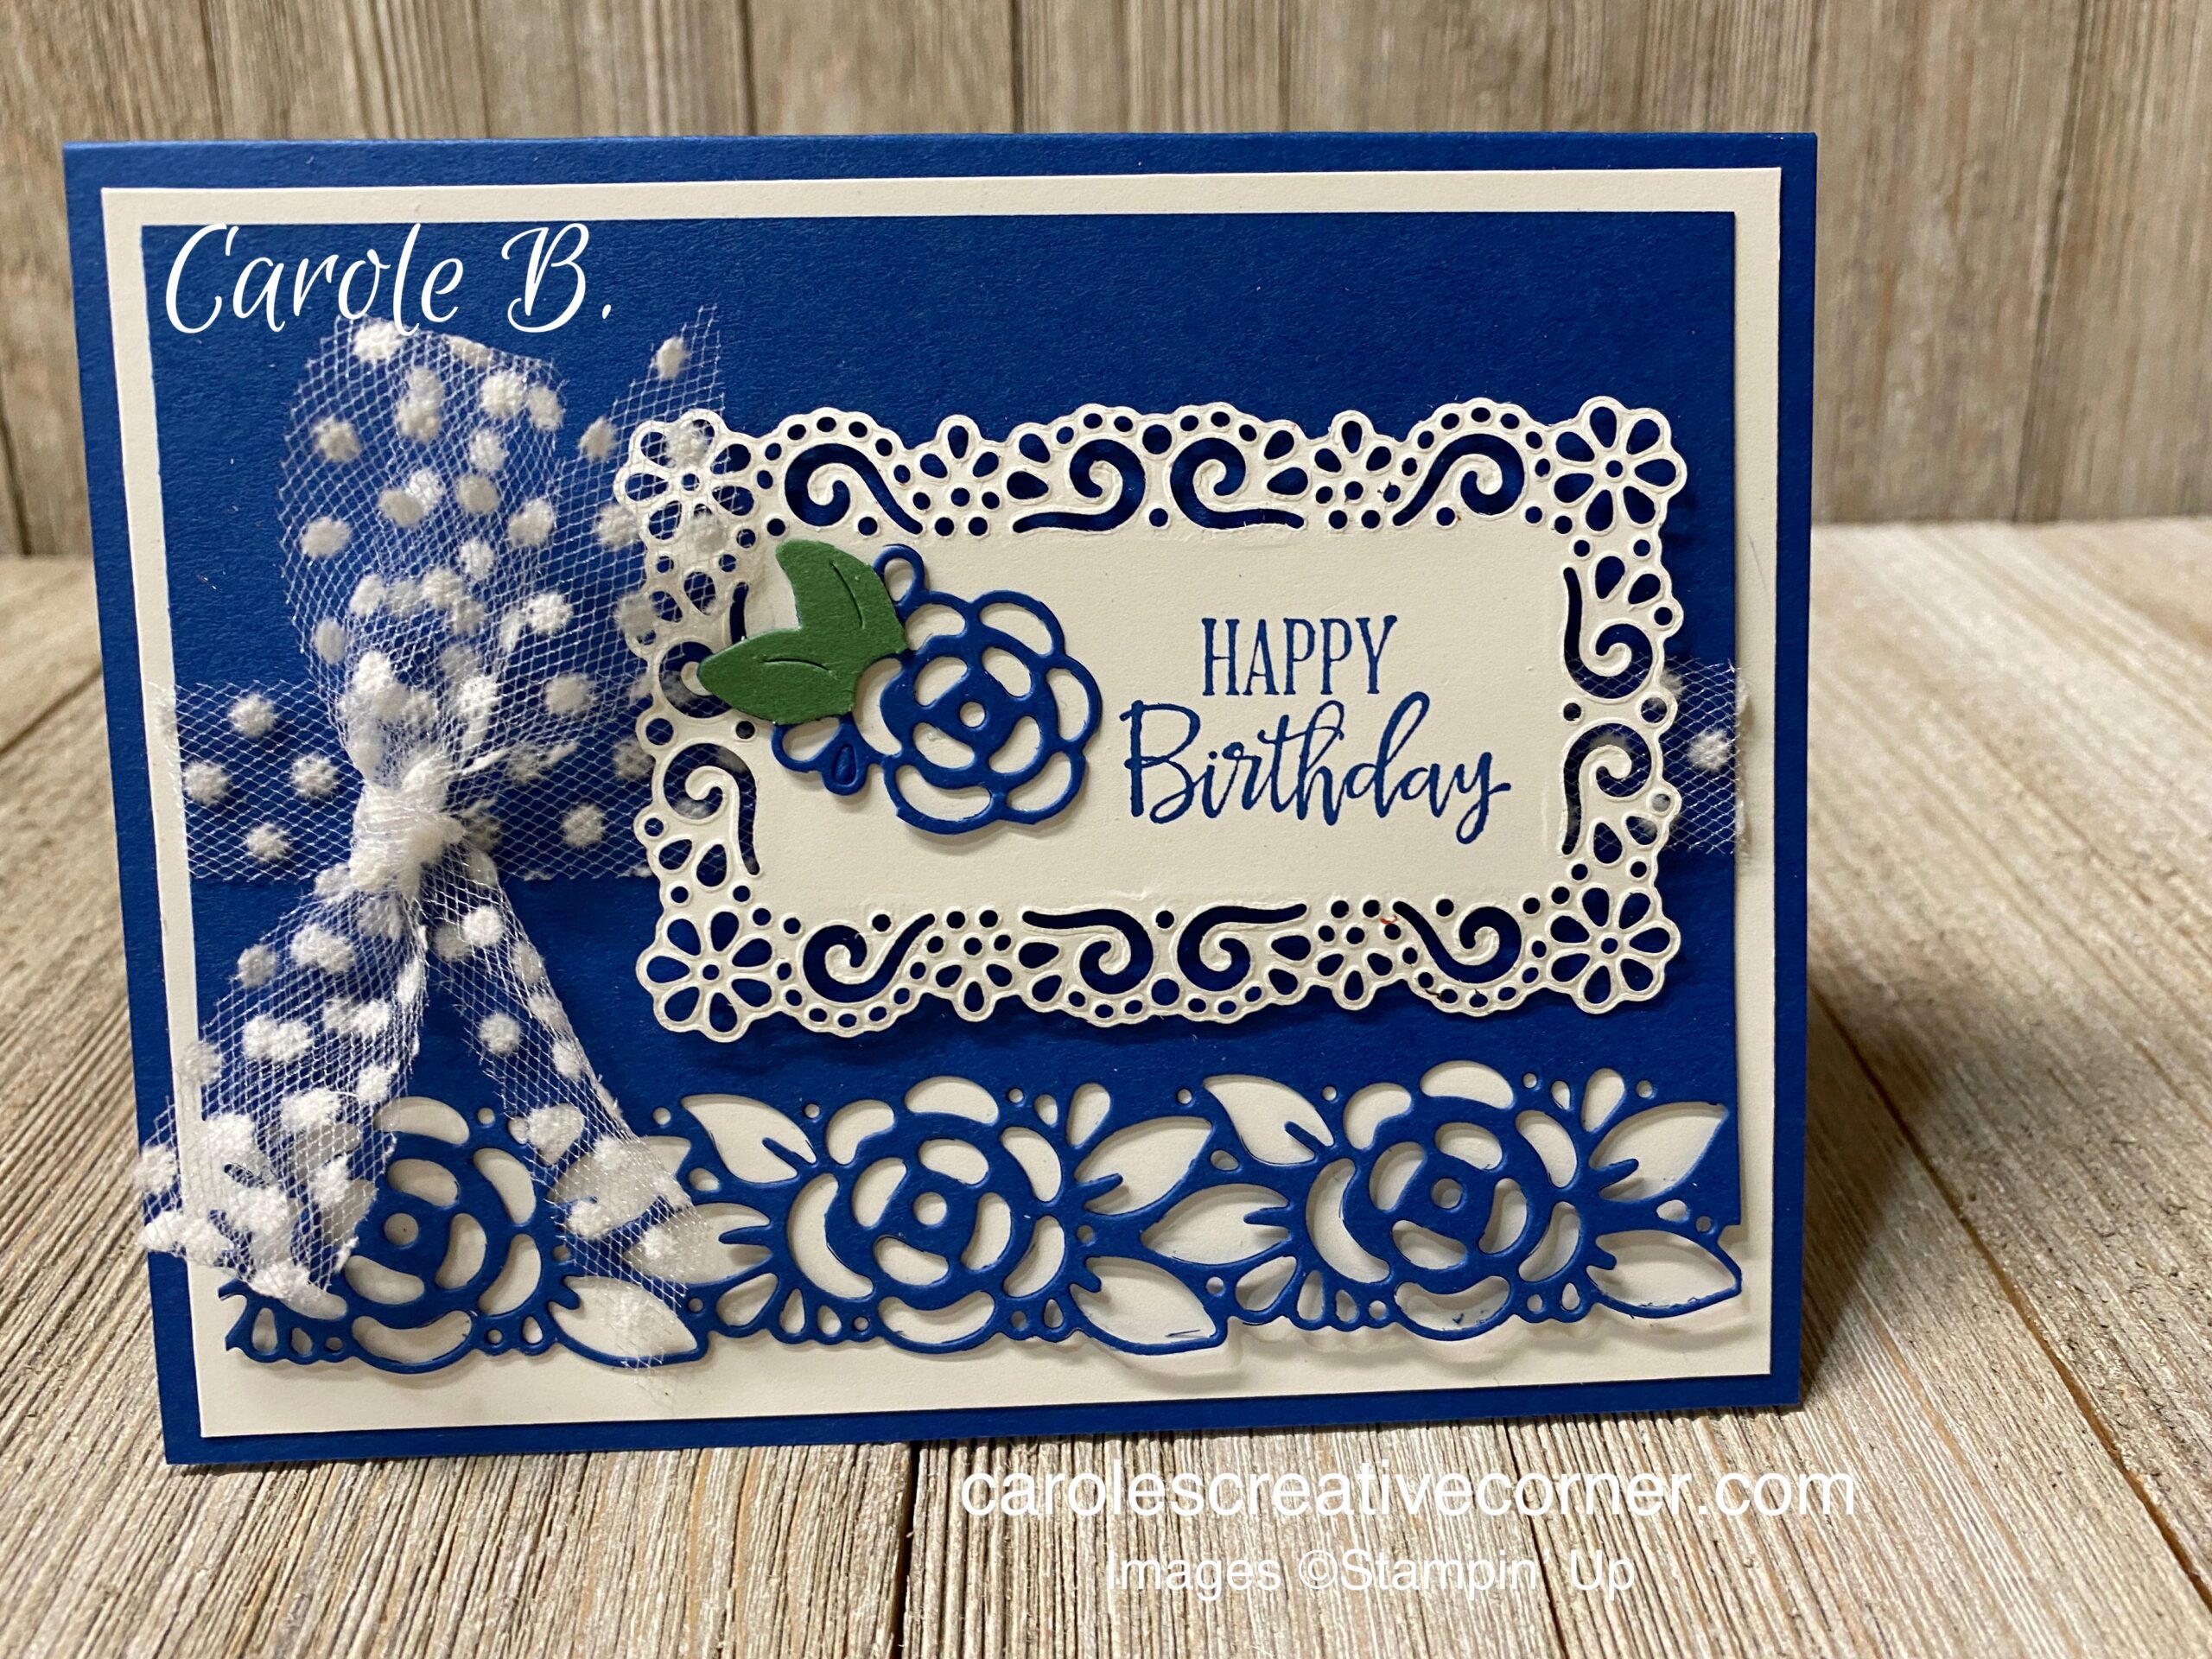
This card really shows off the beauty of the Ornate Layers and Ornate Borders dies. This card is a great Happy Birthday card but any sentiment will do on this beautiful layout!

Measurements

  • Blueberry Bushel: (1) 8.5″ x 5.5″, scored along the 8.5″ side at 4.25″; (1) 3.75″ x 5″; scrap for flower
  • Whisper White: (2) 5.25″ x 4″; (1) 2.25″ x 3.75″ for frame die cut
  • Garden Green: scrap for leaves
  • Ribbon: 7″ for around card stock, 8″ for bow

Directions

  • Layer 5.25′ x 4″ white card stock on the Blueberry Bushel card front.
  • Die cut the flower border on the 5″ side of the 3.75″ x 5″ Blueberry Bushel card stock. Note: One edge of the die cuts through the paper and the other does not. Make sure the cutting edge is at the bottom of the card stock (side with more loops)
Figure 1
  • Wrap the ribbon around the middle of the blueberry bliss layer and adhere on the back with scotch paper (Fig. 1) Then adhere the 3.75″ x 5″ onto the white layer.
  • Die cut the small frame on whisper white with the Ornate Layers die. Stamp the sentiment onto the right side of the frame (along the long side of the frame) with blueberry bliss ink.
  • Die cut the small blue flower and die cut the green from one of the Ornate Border dies and adhere to the left side of the white frame.
  • Apply dimensionals to the back of the white frame and adhere to the right side of the card front. Add glue dot to bow and adhere to left side of card front.
  • Die cut the flower border on the 5.25″ side of the 4″ x 5.25″ of the Whisper White card stock. Note: One edge of the die cuts through the paper and the other does not. Make sure the cutting edge is at the bottom of the card stock (side with more loops)
  • Adhere to inside of card. Stamp sentiment with blueberry bliss ink in center.

Supplies

Stampin Up Sending Flowers: Tunnel Pop Out Card

With only a few more weeks of Stampin’ Up Sale-A-Bration remaining, it will be hard to see the Stampin’ Up! Sending Flowers dies go.  I love this die set and this card is sure to make an impression on your loved ones. This tunnel card looks complicated, but it’s so easy!

Finished Card
Picture 1: Finished Card

Measurements:

  • Whisper White card stock:   5.5” x 8.5”, scored at 4.25” on 8.5” side for card base; 1” x 4” for sentiment; white scraps for flowers
  • Calypso Coral card stock:  (1) 4.25” x 5.25”, (1) 5.5” x 8.5” scored at 2 ⅛”, 4 ¼”, & 6 ⅜” on 8.5” side
  • Granny Apple Green card stock: 1.25” x 3.25” piece
  • Classic Weave White Ribbon:  8”
  • Designer Series Paper (DSP):  Pleased as Punch (1) 4”x 5.5”; (2) 0.5” x 5.5”, (1) 4”x 4”
  • Designer Series Paper (DSP):  Free as a Bird striped 4”x 4”

Directions:

Die cut of flowers
Picture 2: Cut Sending Flowers on a 4.25″ x 5.5″ piece of Calypso Coral cardstock
  • Die Cut Sending flowers on 4.25”x5.5” piece of Calypso Coral cardstock, placing die about ½” down from top of card stock.  Then die cut Sending flowers from the 5.5” x 8.5” Calypso Coral cardstock, centering along the 8.5” side. (See Picture 2)
  • Color stems of both flower die cuts with granny apple green blends pen.  Die cut white flowers and add to some of the flowers on each die cut. 
  • Adhere tulip DSP to inside of white card base, centering along fold, and top to bottom.
  • Adhere 0.5”x5.5” strips on the inside edges of white card base.
Folding Sending Flowers Card
Picture 3: How to fold the card
  • Fold 5.5”x8.5” Calypso Coral CS along score lines:  first fold is a valley, middle is a mountain, and last is a valley (see Picture 3).  Adhere one edge of Calypso Coral CS alongside the 0.5” strips of DSP.  Glue the other edge to other edge of inside card base, next to DSP strip.  This ½” on each side makes sure when card is folded, flowers do not stick out of card.
adhesive
Picture 4: How to adhere the piece on the backside to cover the die cut opening
  • Add adhesive to backside of 4.25”x5.5” Calypso Coral CS, including flowers.  Adhere 4”x4” of DSP to backside of Calypso Coral 4.25”x5.5” to cover die cut opening (see Picture 4). Then adhere Calypso Coral CS to front of card base.
  • Die cut white label and green stitched rectangle.  Stamp sentiment on white label.  Adhere to front of card with dimensionals.
  • Add white bow to front of card with glue dot.
  • Die cut stitched rectangle and stamp sentiment for inside of card.

Supplies for Sending Flowers Card:

  • Dies: Stitched Rectangle 1” x 3”
  • Dies: Stitched So Sweetly 3.25”x2” rectangle

Happy Birthday To You: Birthday Card

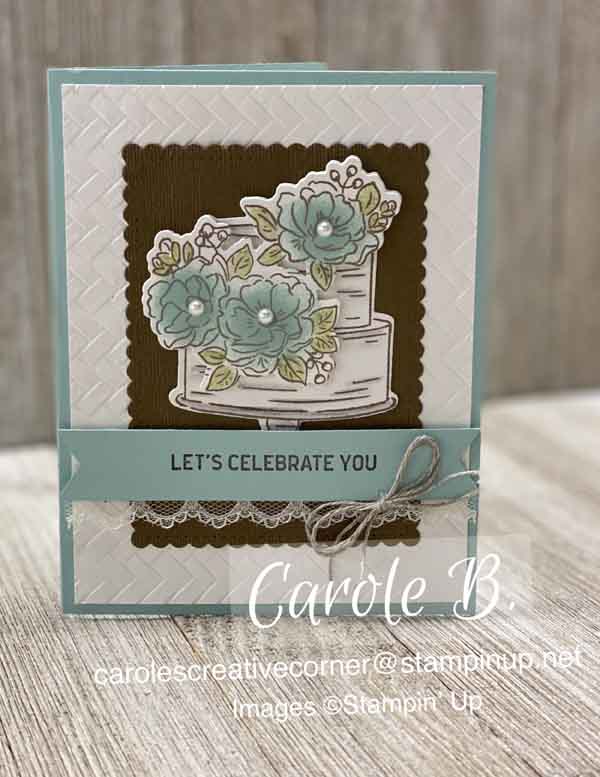
This birthday card is so easy to make using the Happy Birthday to You stamp set and coordinating dies. When you give it to someone, you will make them feel special!

Measurements:

  • Card base: Pool Party (fold on left hand side) 8.5”x5.5”, scored on 8.5” side at 4.25”; (1) 0.75”x4.25” piece for sentiment
  • White CS: (2) 4”x5.25””, (1) piece to die cut 2 cakes
  • Soft Suede CS: (1) 3.75”x4.75”
  • Linen Thread: (2) 8” pieces
  • Scalloped Lace Trim: 4.25”

Directions:

Picture 1

Stamp 2 cakes in Expresso Brown ink on extra paper (Picture 1) and die cut one cake and then die cut only the flowers from the second cake. 
Sponge daub the die cut flowers with pool party ink and color the leaves with green watercolor pencil. Next, blend the color on the leaves with blender pen (Picture 2). Color lines on cake with gray watercolor pencil.

Picture 2

Emboss white card stock (4”x5.25”) with Coastal Weave embossing folder. 
Die cut the stitched rectangle from Soft Suede card stock and then emboss with Subtles embossing folder.

Picture 3

Use the Banner Triple punch to cut the ends of sentiment strip—only punch tip of the ends;  don’t insert strip to the end of the punch.  See Picture 3.  Next stamp sentiment and then adhere the lace to back and bottom of sentiment strip.

Picture 4

Layer the white and Soft Suede layers to card front with tear & tape.  Adhere cake to card front with adhesive.  Next, put dimensionals on back of flower die cut and place on top of first cake. Decorate flowers with pearl centers
Place sentiment strip on card with dimensionals (Picture 4)
Adhere twine bow with glue dot.
Stamp inside of card. Give to the special person for that special occasion!

Supplies for Happy Birthday to You Card:

Honey Bee: “BEE”utiful Birthday Card

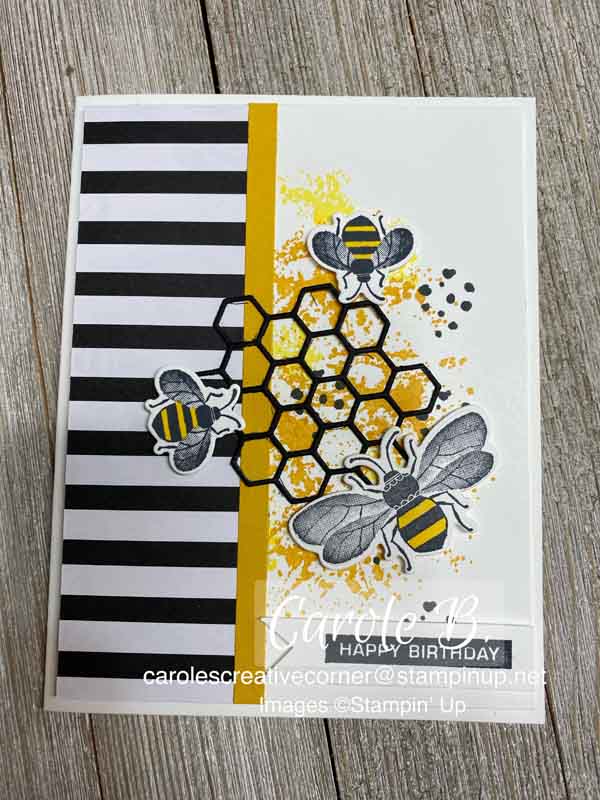
Who would not love this “bee”utiful card? This card is made with the Honey Bee stamp set and Detailed Bee dies. Let’s get busy and have fun with this project.

Measurements:

  • Whisper White card stock: (1) 8.5” x 5.5” scored on 8.5” side at 4.25” for card base; (2) 4” x 5.25” card front and inside; ½” x 2” for saying
  • Golden Honey DSP: 1.5” x 5” stripe pattern
  • Crushed Curry card stock: 0.25” x 5”
  • Black card stock for hexagon: 3″x3″

Directions:

Picture 1

Stamp background speckles with Crushed Curry ink on 4”x5.25” white cardstock in the center and to the right as shown in Picture 1; stamping off on scratch paper occasionally to create two colors. Stamp black speckles.

Picture 2

Adhere striped Designer Series Paper to left-hand-side of 4”x5.25” white card stock and then adhere the crushed curry strip next to it as shown in Picture 2.

Add dimensionals to the back of the white 4”x5.25” card front and adhere to front of card base.

Picture 3

Stamp sentiment on white strip, ½” from the end. Next, cut strip at end of saying. Second, make a banner to the left of saying by cutting ¼” in the center of strip and then cut from each end to the center of the cut to form a banner. (see Picture 3). Put 2 dimensionals on back of saying and adhere to bottom right of card front.

Picture 4

Stamp and die cut a black hexagon, large bee and 2 small bees from scrap paper.  Color in bees with yellow marker.  Put 2 dimensionals on back of large bee and 1 on each of the small bees.  Adhere hexagon by using adhesive on edges and add bees to front card. (see Picture 4).

Stamp inside of card with bee, flower, & sentiment.

Supplies for Honey Bee Card:

  • Black Cardstock for hexagon
  • Ink:  Crushed Curry & Black Memento
  • Label Me Bold Stamp Set:  Happy Birthday & Thank you & Speckles
  • Honey Bee Stamp Set:  Right curved Flower, Big and Small Bee
  • Birthday Bonanza:  Birthday Saying
  • Detailed Bee dies:  Large and small bee, hexagon