Category: Fun Fold Card

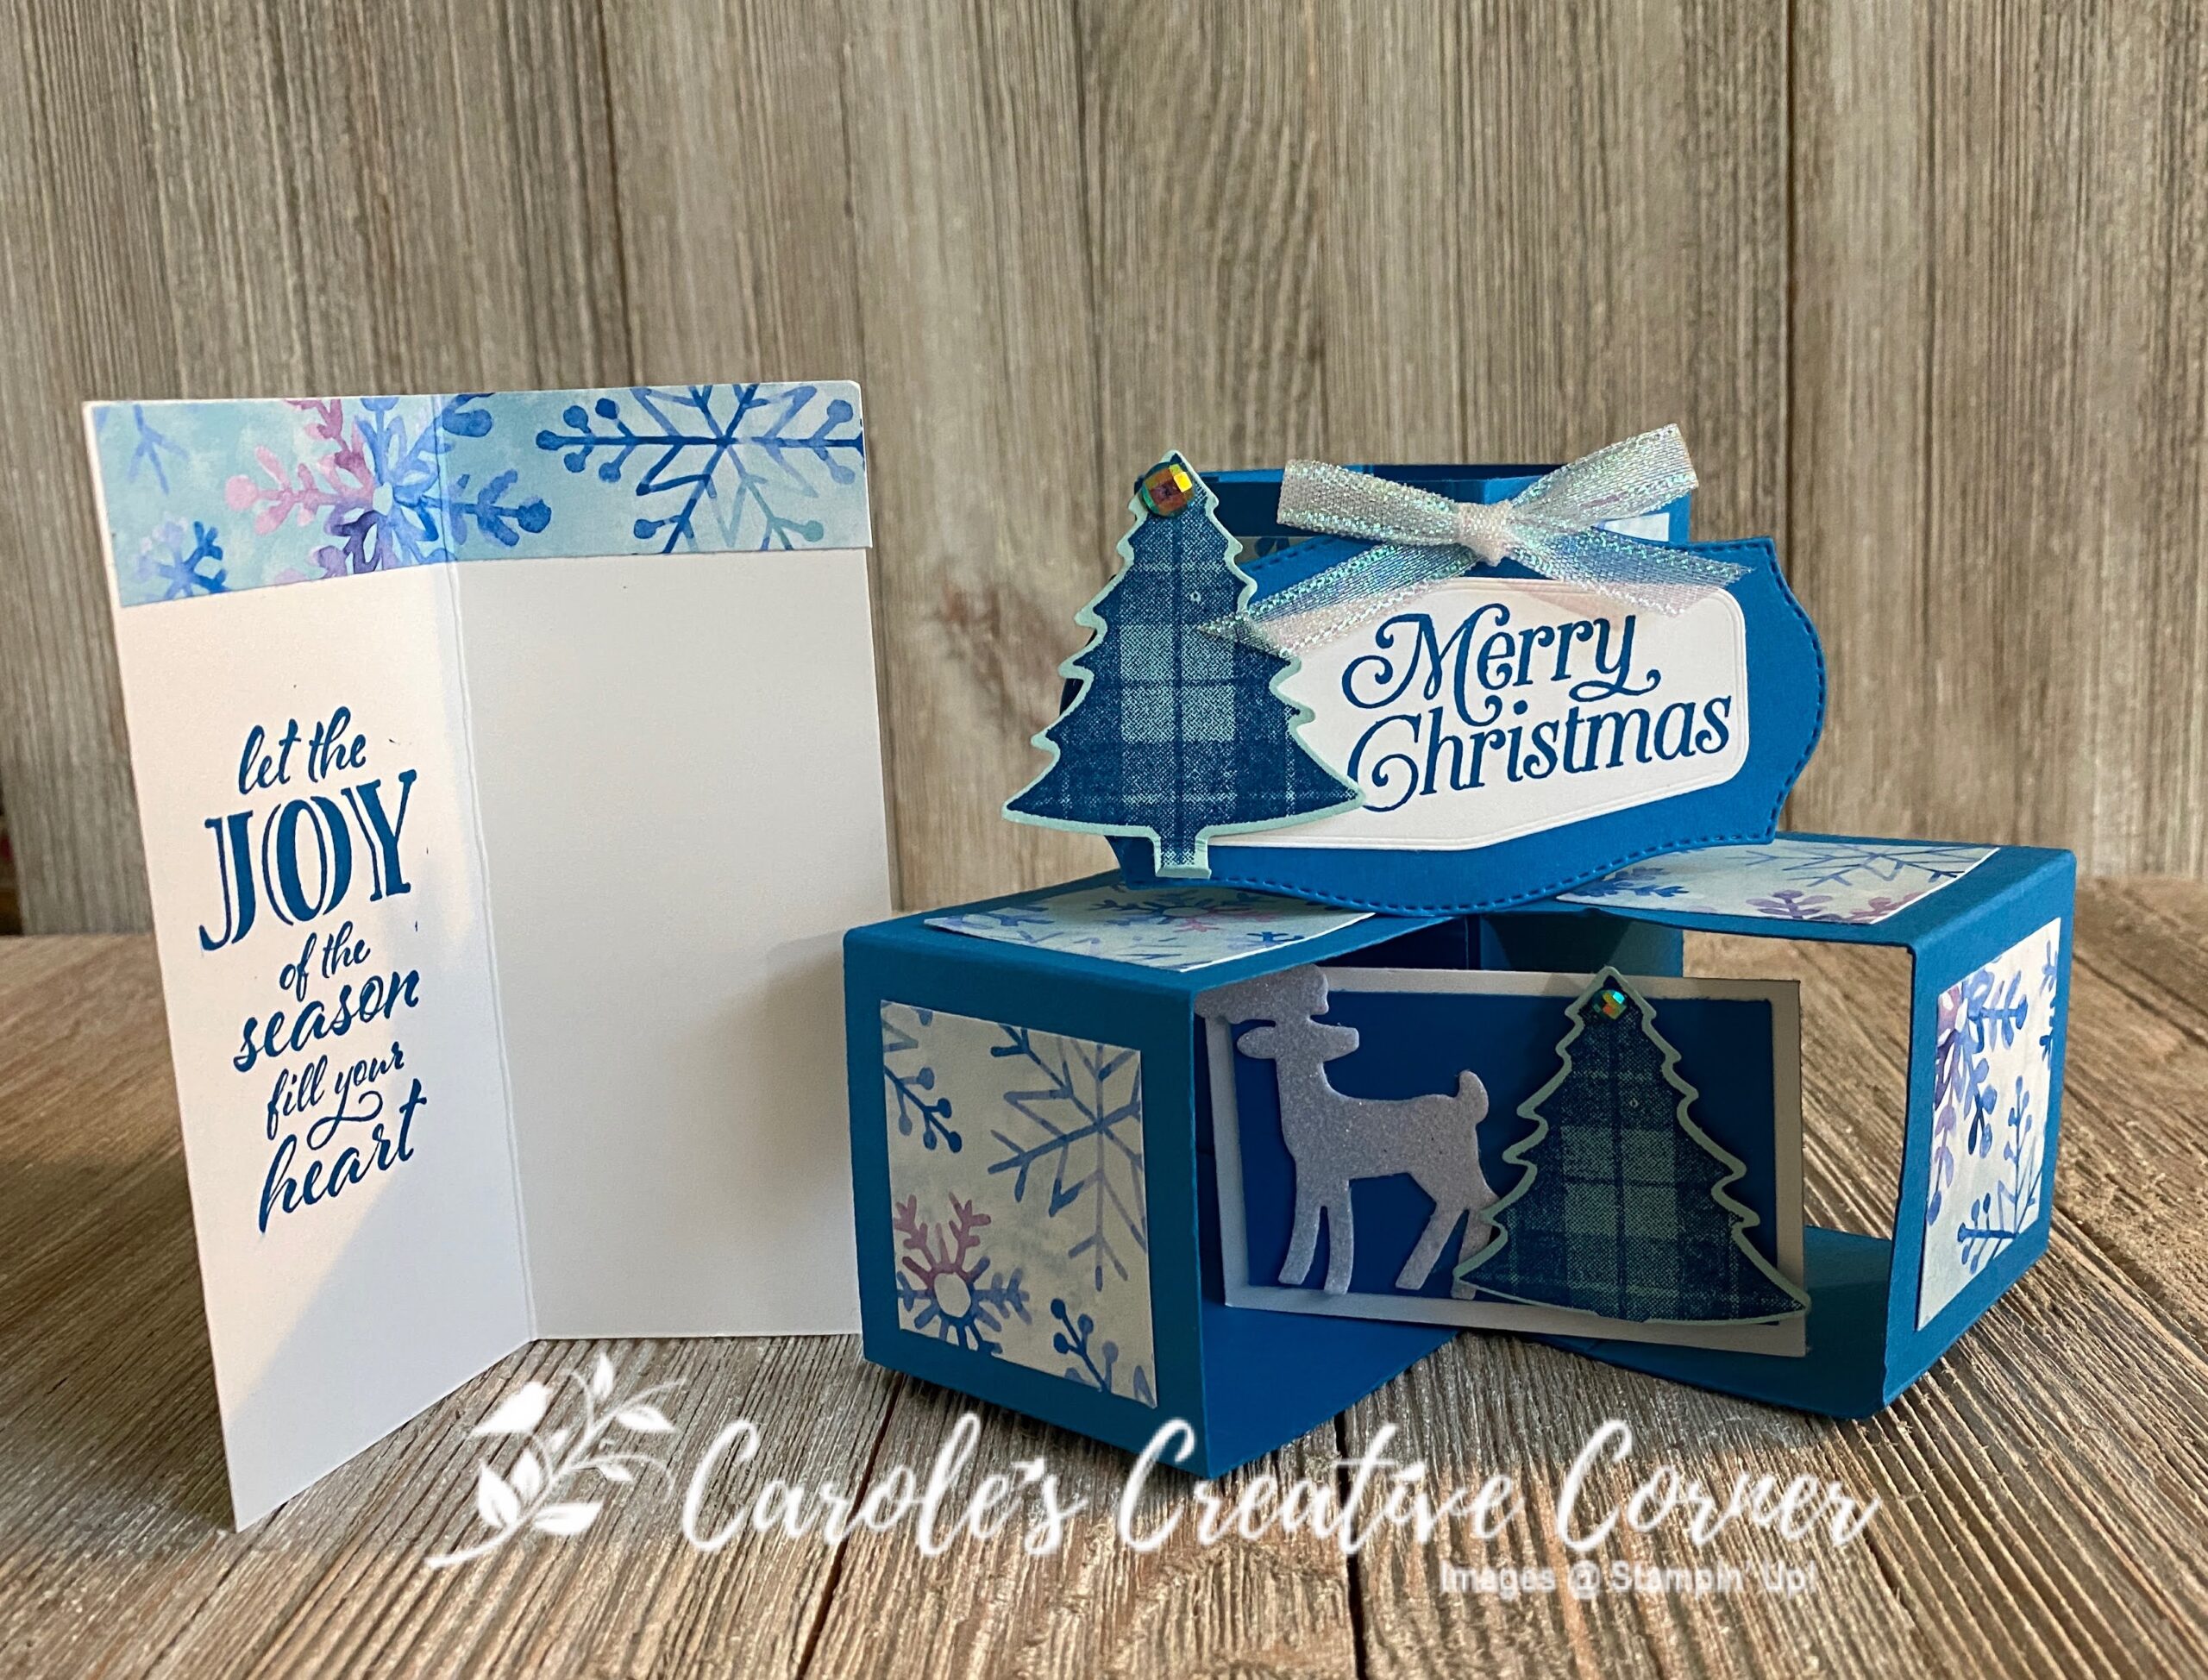
Perfectly Plaid Pop Up Cube Card

This Perfectly Plaid Pop Up Cube card is a fun card to give for the holidays! The deer scene at the bottom is a fun inside surprise! The options for decorating this fun fold are limitless. Give it a try with your favorite designer series paper and stamp set…

Measurements:

  • Pacific Point cardstock:
    • Card Base large cube: (1) 4″ x 8.5″, on the 8.5″ side score at 2″, 4″, 6″ and 8″;
    • Card Base small cubes: (2) 2″x8.5″, on the 8.5 side, score at 2″, 4″, 6″, and 8″;
    • Tabs: (4) 3/4″ x 1.5″, scored on the 1.5″ side at 3/4″,
    • Bottom Scene: 1.5″ x 2.5″
  • Whisper White cardstock:
    • Bottom scene mat: (1) 1.75″ x 2.75″
    • Upper sentiment: 1.5″ x 3.5″
    • Slip-in sentiment: 3.75″ x 4.5″ , scored on 3.75″ side at 1 7/8″
  • Snowflake Splendor Designer Series paper (DSP):
    • (6) 1.5″ x 1.5″,
    • (1) 3/4″ x 3.75″ for slip in sentiment
  • Pool Party cardstock: piece for 2 punched trees
  • White Glitter paper: piece for die-cut reindeer

Directions for Perfectly Plaid Pop Up Cube Card:

Stamp 2 plaid trees on Pool Party paper in Pacific Point ink and then punch.
Die cut the Pacific Point label and white label. Stamp the sentiment on the right hand side of the white die cut and then adhere the white die cut to the Pacific Point label.
Add the Plaid tree to the label on a dimensional, ensuring the tree stump is not lower than the bottom of the Pacific Point label.
Lay the three 8.5″ pieces on your work surface. Crease all the folds in the same direction and crease with a bone folder.

Pop Up Cube Card
Note: This paper should be Pacific Point (not White) per measurements above.

Place a piece of Tear & Tape on the 1/2″ scored section on all three pieces, closer to the scored edge. Remove backing from the Tear & Tape.

Pop Up Cube Card
Note: This paper should be Pacific Point (not White) per measurements above.

Fold the opposite side over onto the adhesive, press to adhere. This should now form a cube shape. Repeat until all three pieces are cube shapes.

Pop Up Cube Card
Pop Up Cube Card

Place two pieces of Tear & Tape on one side of each of the small cubes. (Put tape on the side of the cube next to the seam–this way the seam will be toward back of card)

Pop Up Cube Card

Flatten the tall rectangular cube (put the seam toward the side (versus front or back). Flatten one small cube and adhere it to the left side of the tall rectangular cube–lining it up with the center seam, the outside left edge, and the bottom edge. Adhesive should be near the bottom.

Repeat to the right side of that center seam on the tall rectangle cube and attach the second small cube on the right side of the flattened tall rectangular cube with the adhesive portion at the bottom.

Pop Up Cube Card
Pop Up Cube Card

Flatten the cubes and adhere the 1.5″ x 1.5″ square of designer series paper to the center of each square.

Pop Up Cube Card
Note: Pacific Point cardstock and different pattern of DSP is used on the card (vs. the White & blue snowflakes)

Lay out the four small scored tabs. Place 1/2″ piece of Tear N Tape to the left side of the score and a 1/2″ piece to the right side of the score. Fold on the score.

Pop Up Cube Card

Pull off the backing pieces of the Tear & Tape and adhere two of them to the upper portion to the left and right of the center seam. This is where you will place your top greeting and bottom scene. Test where to place the tabs by holding up the label on top of the small cubes and eye where the center would be.

Pop Up Cube Card

Add greeting to upper section. Assemble the scene and add to lower section.
Add bow to upper section and add faceted blue gems.
Adhere DSP to the top of slip-in white cardstock and stamp sentiment in Pacific Point. Crease on fold and slip-in to inside of tall cube.

Supplies:

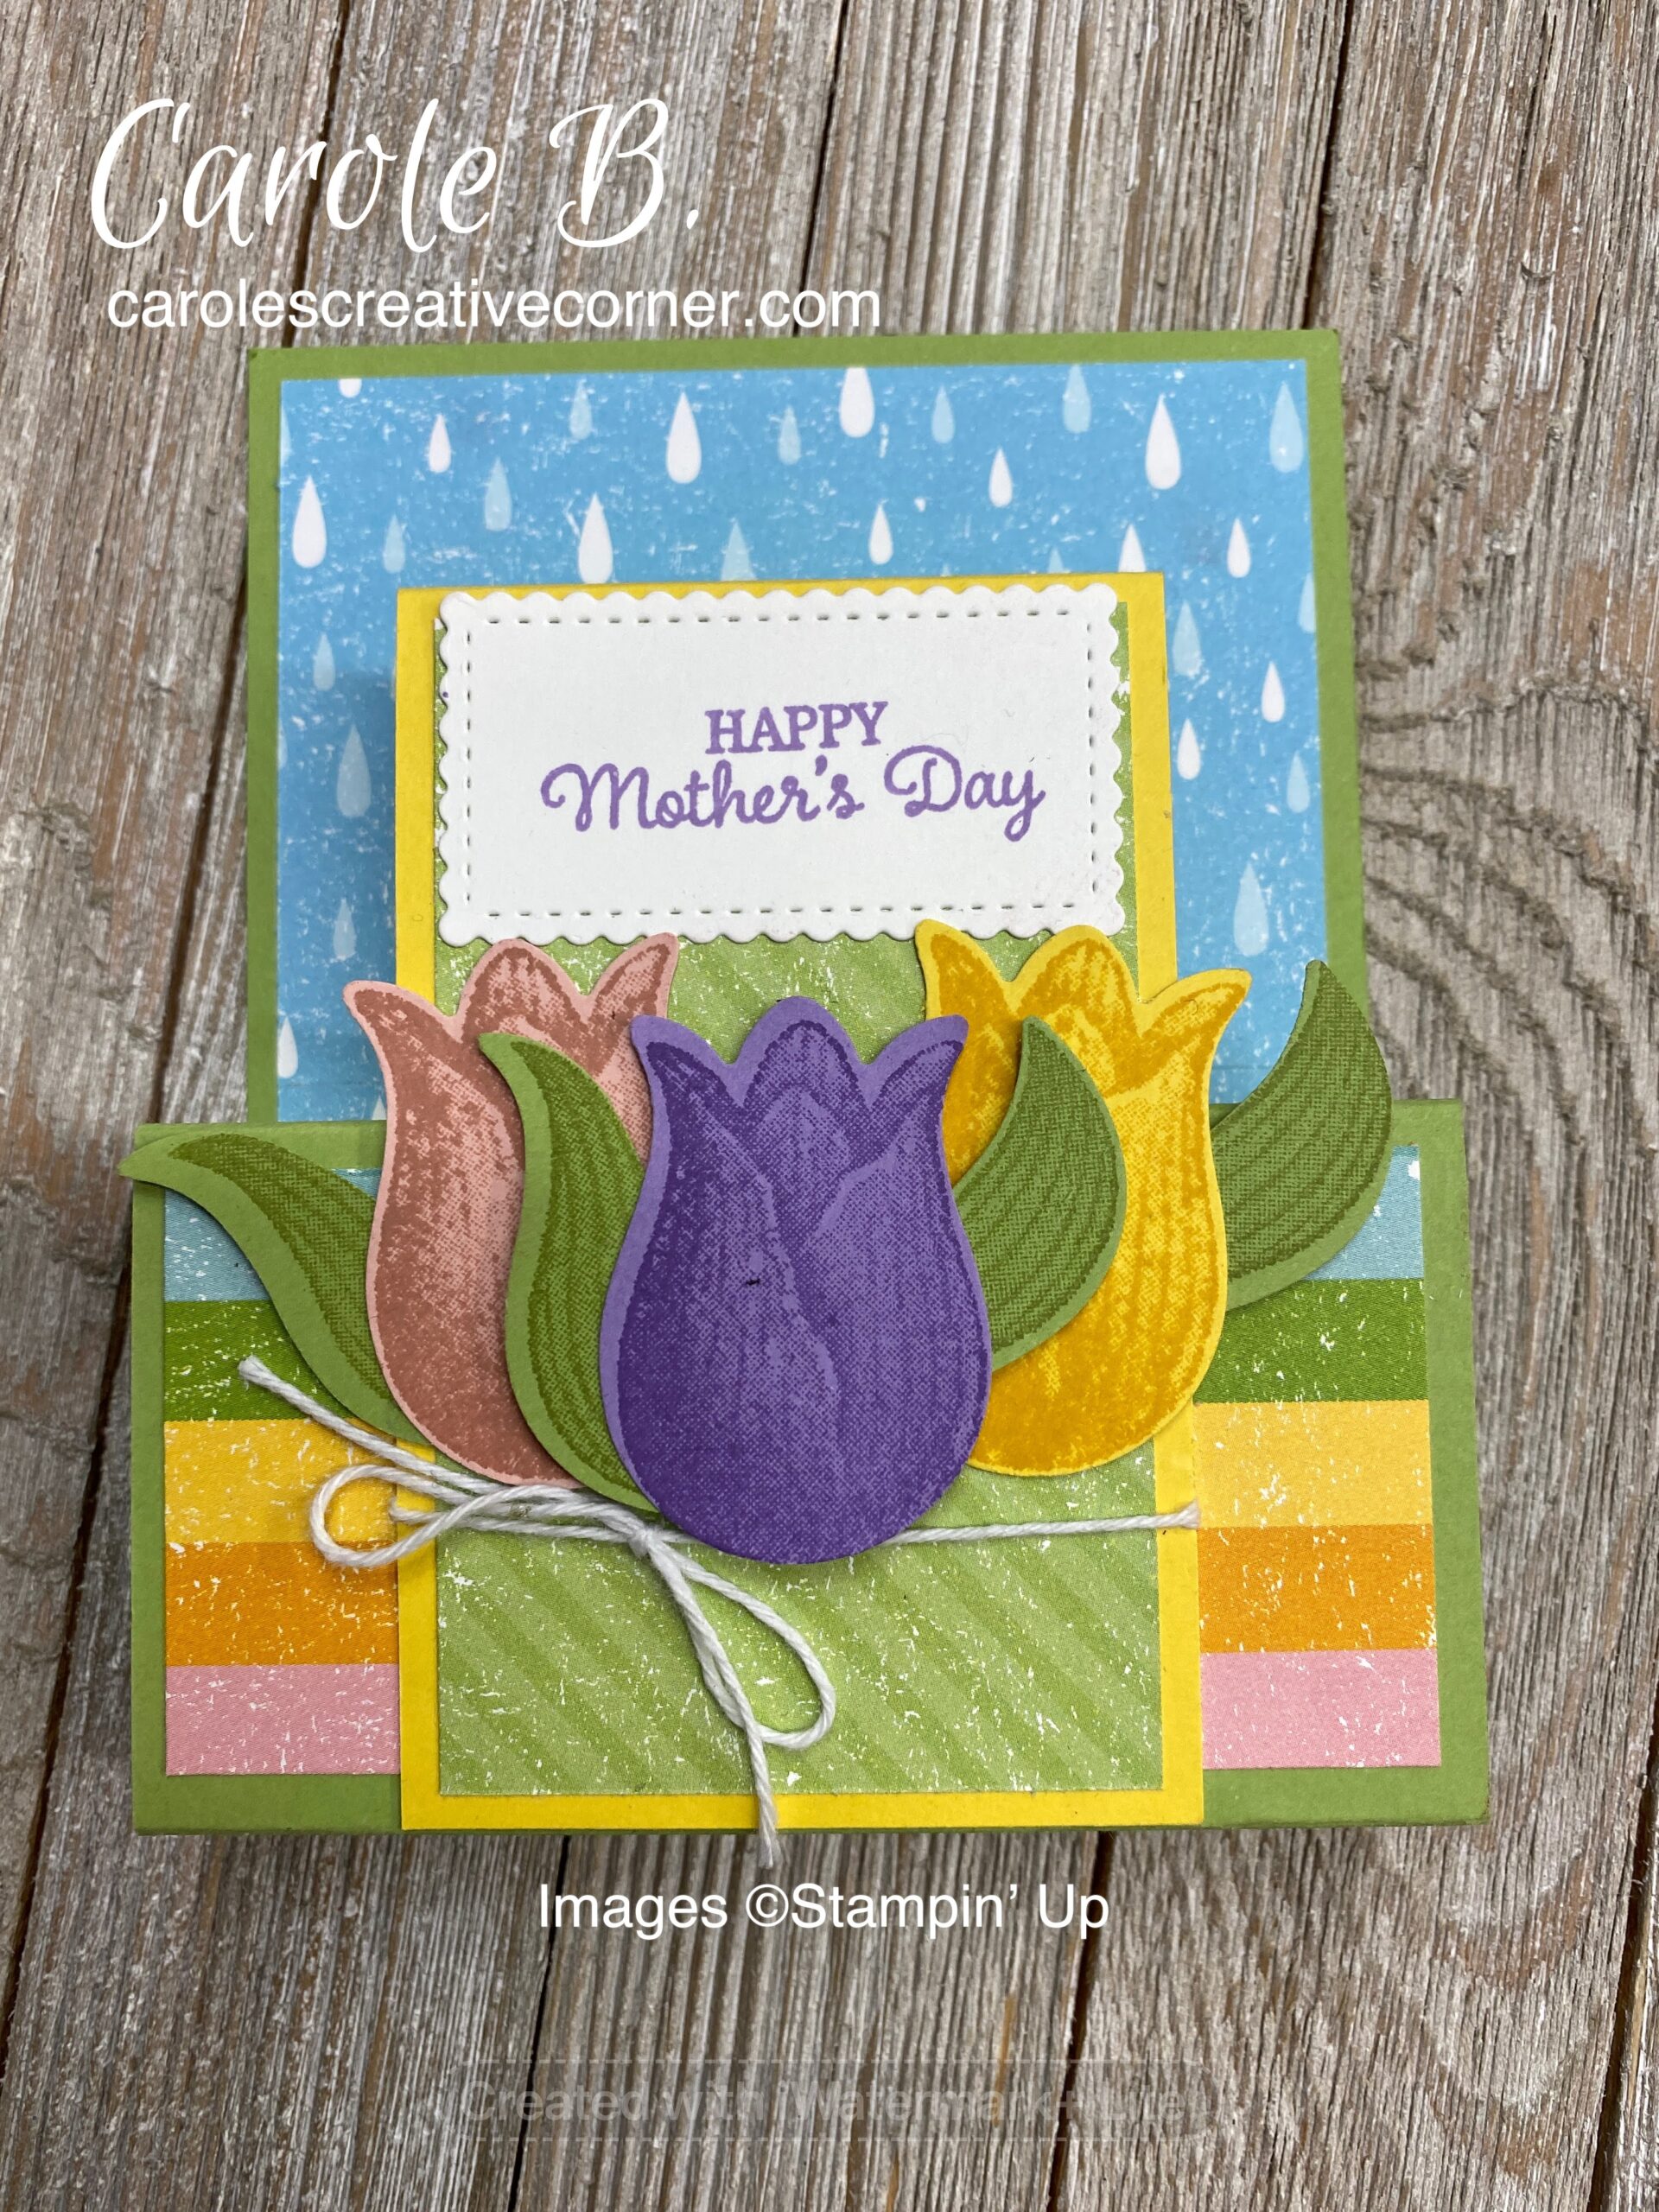
Stampin Up Timeless Tulips: Step Fold Card

Tulips are a symbol of spring and cards made with Stampin’ Up Timeless Tulips and the Tulip Builder Punch are full of joy and love of Spring!  This card is well suited for Easter, Mother’s Day and anytime you need a card to brighten someone’s day!    

stamping timelesstulips stampinup handmadecards rubberstamping stepfoldcard
Timeless Tulip Step Fold Card

Measurements for Timeless Tulips:

Whisper White card stock: 5.25”x4.25”, white scrap for tag
Daffodil Delight card stock: 2.5” x 5.25”, scored at 0.5”, 1.5” on 5.25” side
Pear Pizzazz card stock: 4.25”x10.25”, scored at ½”x 1.5” x 3.75” x 4 ¾” on the 10.25” side.
Whisper White Bakers Twine: 14”
DSP: Pleased as Punch Green sheets: (1) 3/4”x4”; (1) 2.25”x3.75”; (1) ¾”x2.25”
DSP: Pleased as Punch Rain: 4”x3.25”
DSP: Please as Punch Stripes: 4” x 2”

Directions

Place tear & tape on the ½’ scored section of the Pear Pizzazz and the Daffodil Delight card stock. Crease all the score lines on the Pear Pizzazz and Daffodil Delight card stock in same direction with a bone folder, keeping the tear & tape on the outside of the folds, i.e. it should not be on the inside of the box that it forms.
Adhere the striped paper and the green strip on the Pear Pizzazz card stock in the 2 sections next to the tear & tape. Flip over the Pear Pizzazz cardstock and adhere the rain paper to the largest section at the top (figure 1)

Figure 1

Tie the twine around the 2.25” side of the 2.25”x 3.75” green sheet about 1/3” from the bottom. Next, adhere this green piece to the largest section of the Daffodil Delight card stock on the side with the tear & tape. Adhere the smallest piece of green paper onto the Daffodil Delight card stock (see Figure 2).

Figure 2

Adhere the Daffodil Delight card stock to the striped paper, with patterned paper facing away from back of card.
Stamp the greeting and adhere to the top of the largest section of the Daffodil Delight card stock (Figure 3)

Figure 3

Decorate the front with punched and stamped tulips and leaves; use dimensionals on the center tulip.

Place 1 leaf and 1 tulip on each side of card
Figure 4 – Add center tulip with dimenstionals

Important Step:

It is time to take off the tear & tape and adhere ends to card base. First, fold the Pear Pizzazz card stock between the bottom of the card (i.e. the fold between the bottom of back of the card and the bottom of the card, i.e. the section with no card stock). Second, fold in the section between the top of the stripe paper and the section with the green paper card stock (see Figure 5). Take off the tear & tape, keeping the folds in place and lay flat against back of card to adhere.

The next step is to adhere the Daffodil Delight cardstock to back of card. Keeping the card folded as you did for the Pear Pizzazz piece, fold the Daffodil Delight card stock between the two green pattern papers and take off the tear & tape and adhere to back of card. You card should be laying flat when you are adhering these pieces.

Figure 5

Stamp the white card stock with sentiment and adhere to back of card.

Supplies for Timeless Tulips Card: